
Making a replica Zulu isihlangu shield
This project was part experimental archaeology and part craft activity, and was inspired by the history of the large war shields, called isihlangu, used by Zulu warriors.
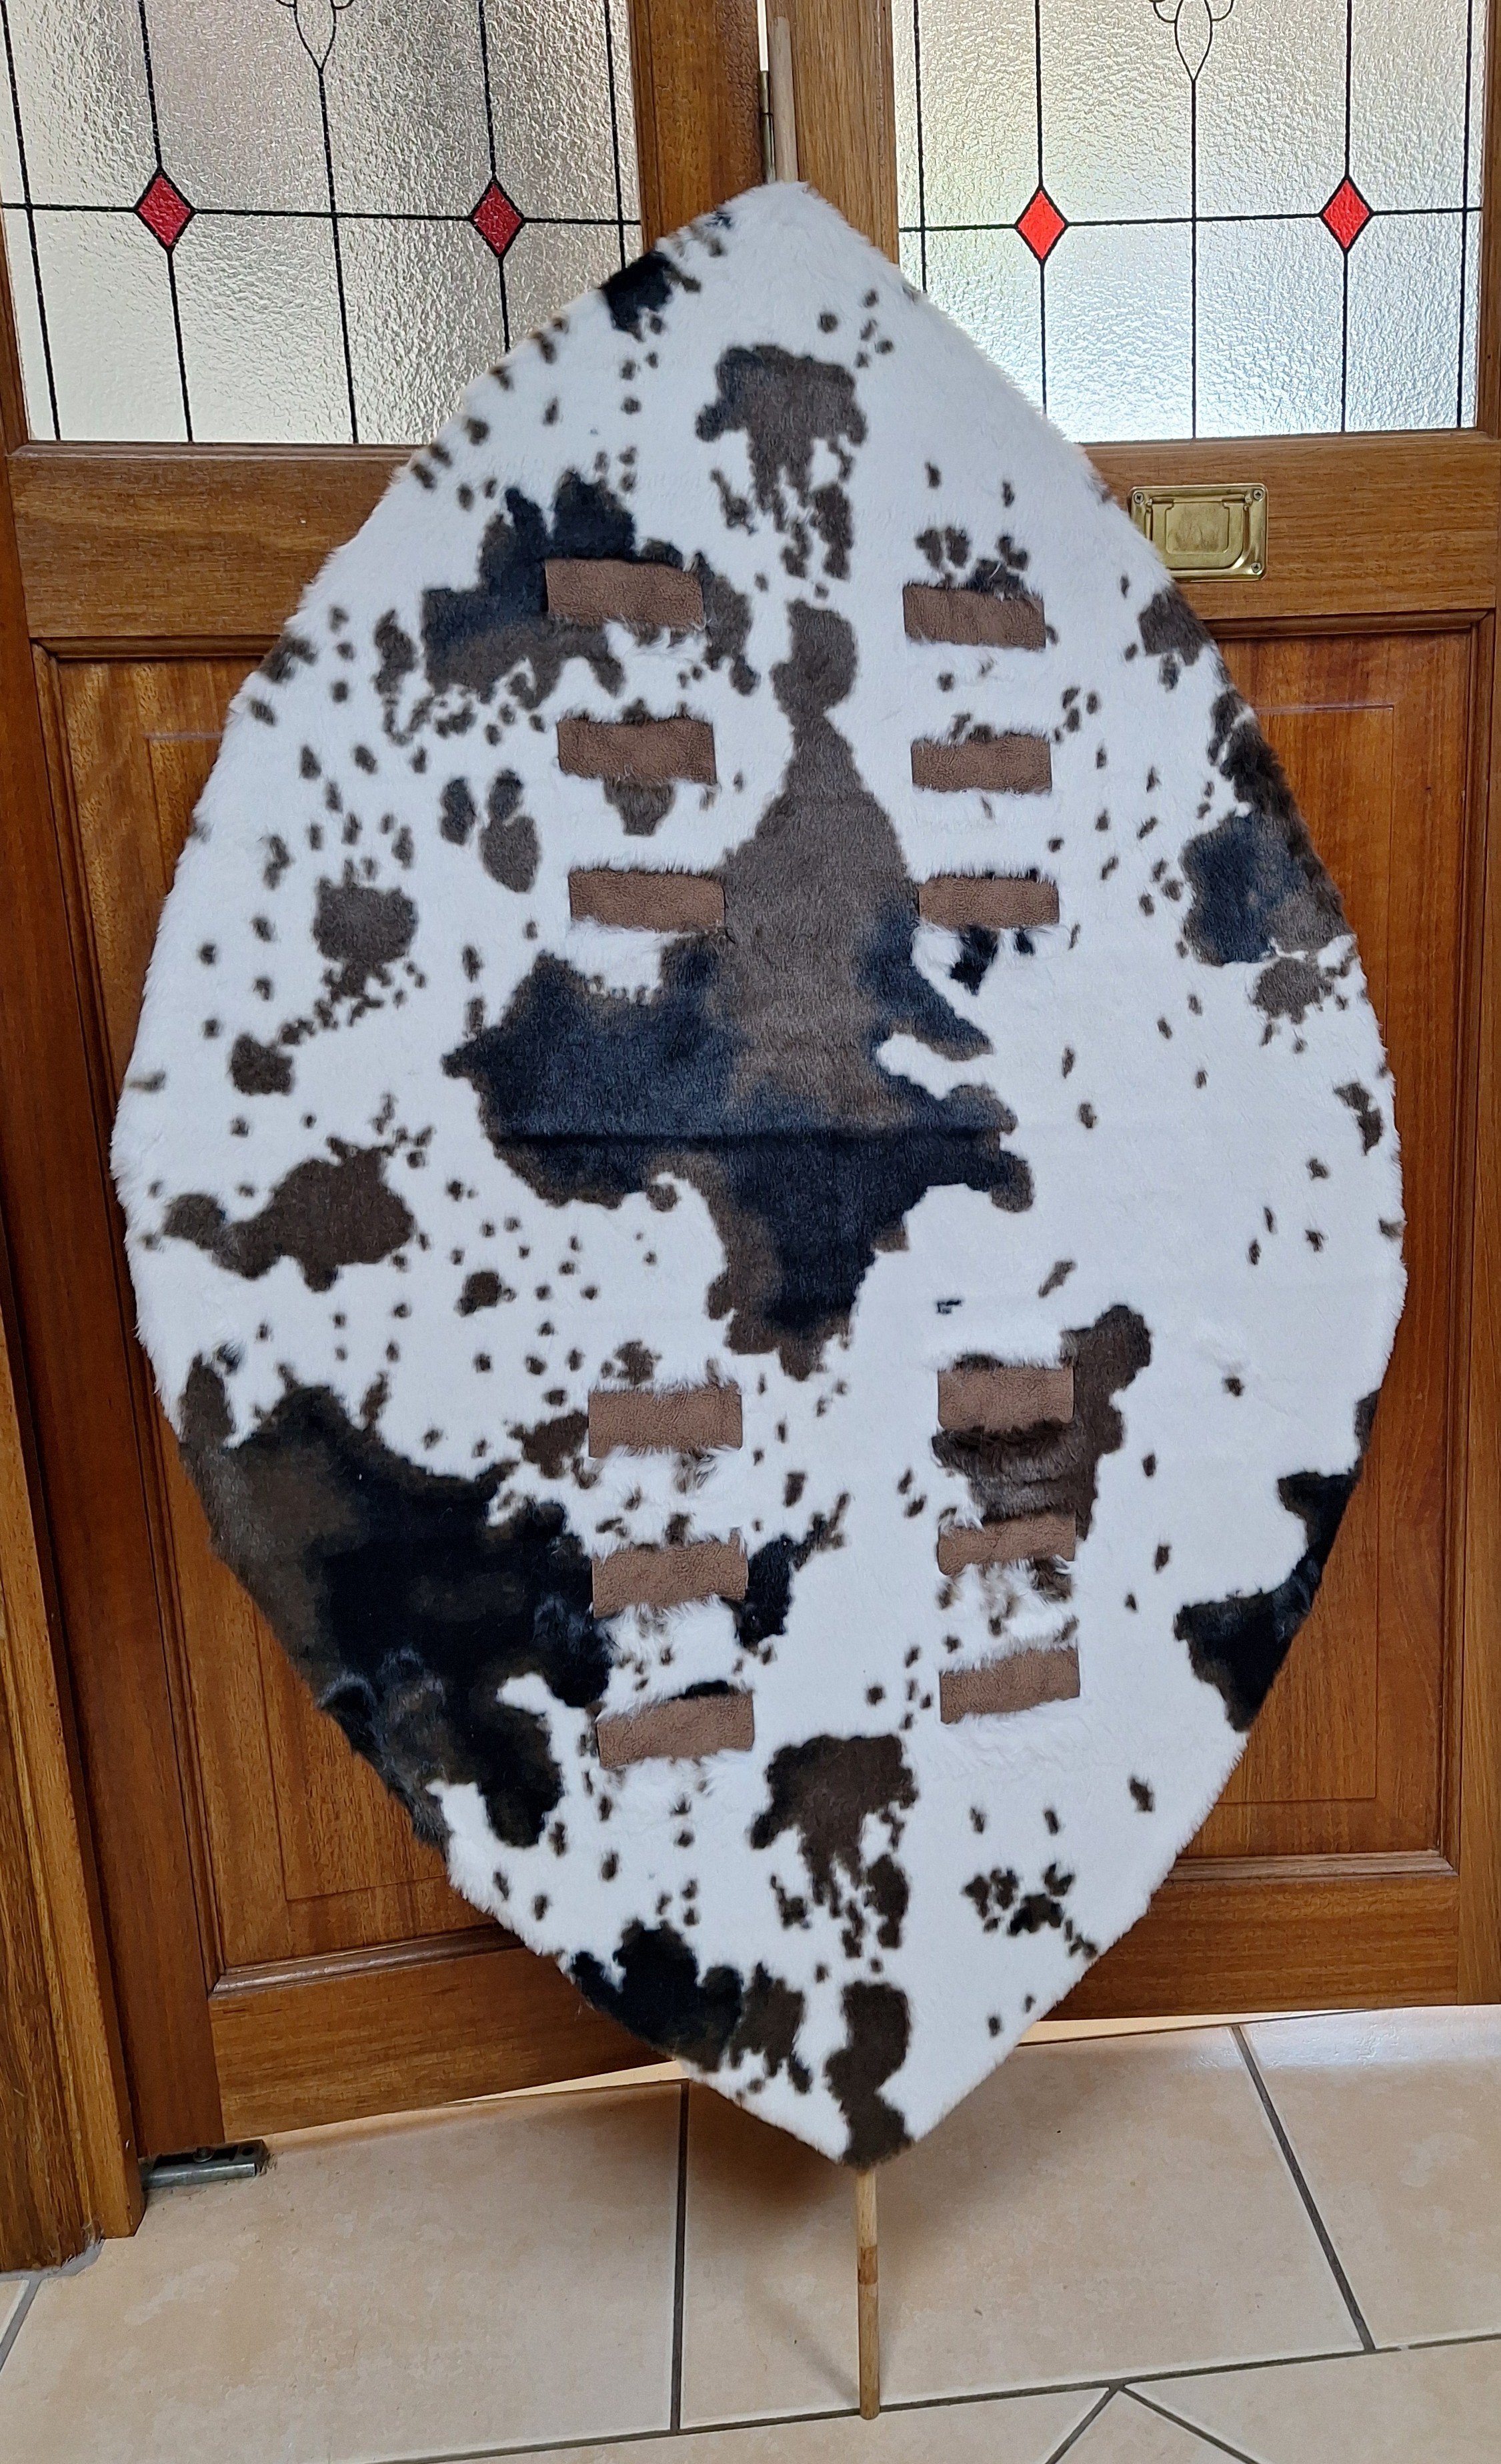
The completed shield, standing about 1 metre tall.
By way of background…
Recently, I have been very interested in the history of the Anglo-Zulu War and the Zulu perspective in particular, and have been doing general reading on the origins and outcomes of the war. Concurrently, I have been learning Swahili (which is, incidentally, not a language of the Zulu region of Africa) but in the process have been enjoying learning about the rich cultures of Africa - a region I never learned about in school at all beyond a very surface-level.
This project was created out of admiration for the craftsmanship and history of the Zulu people. It is my own handmade replica, not an authentic artefact. While researching its construction, I developed a deep respect for the cultural significance of these shields and for the history of the Zulu Kingdom. I hope this project encourages others to learn more about that history and appreciate the remarkable skill involved in making the originals.
Zulu shields come in many different sizes and types, with each serving a different purpose. The main fighting shield is called the isihlangu, and was typically made of ox-hide with the colour scheme being indicative of the warrior’s status - white shields for men, black shields for boys - along with markings delineating regiments or groups. These shields can be seen in the 1964 film Zulu, which depicts the January 1879 Battle of Rorke’s Drift during the Anglo-Zulu War, which occurred between the Zulu Kingdom under King Cetshwayo and the British colonial forces.
Zulu today make a variety of shields for the tourist market, but due to Australia’s strict quarantine laws, it would be quite difficult to obtain a real hide tourist shield for the museum. Additionally, there are the ethical concerns relating to the acquisition of real historical artefacts and I did not want to contribute to the problem. Therefore, I decided that a potential way to express my admiration and appreciation for Zulu culture without dealing with quarantine rules was to create a replica of a fighting shield using local materials.
The creation of this replica was informed by historical lantern slides of Zulu warriors with their shields (for example, here and here), along with photographs of shields in museum collections, such as a shield in the British Museum. That artefact was taken from the battlefield by a British soldier after the Battle of Ulundi, the final battle of the Anglo-Zulu War, which saw the defeat and exile of King Cetshwayo.
Real isihlangu are made with raw ox-hide, which is then strengthened with the insertion of vertical strips of hide. These strips sometimes form the support for loops on the back side which are the handles, or attach to the vertical stick which passes up the back of the shield. My shield replica does not feature a historically-accurate rear side, so there are no handles.
An 1877 book by Reverend John G. Wood describing various world cultures (with a title so unpleasant I won’t repeat it here), covers the making of the Zulu shield thus -
“The double row of black marks down the centre of the shield ... is an addition which is invariably found in these weapons of war, and serves partly as an ornament, and partly as a convenient mode for fastening the handle. In ornamenting the shield with these marks, the Kaffir [sic] cuts a double row of slits along the shield while it is still wet and pliant, and then passes strips of black hide in and out through these slits, so as to make the black of the strip contrast itself boldly with the white shield.”
Making the shield
To make this replica, several factors were taken into account:
Ease of making,
Availability of materials, and
Translating the visual appearance of a real shield into an effective replica.
Therefore, rather than using real ox-hide, faux cow-hide cloth was substituted along with brown faux leather (pleather). Since the cloth was soft, it would need to be stretched over a backing made of thin marine plywood cut into the right shape, to provide stability. A real isihlangu stood firm by the nature of the dried and prepared hide.
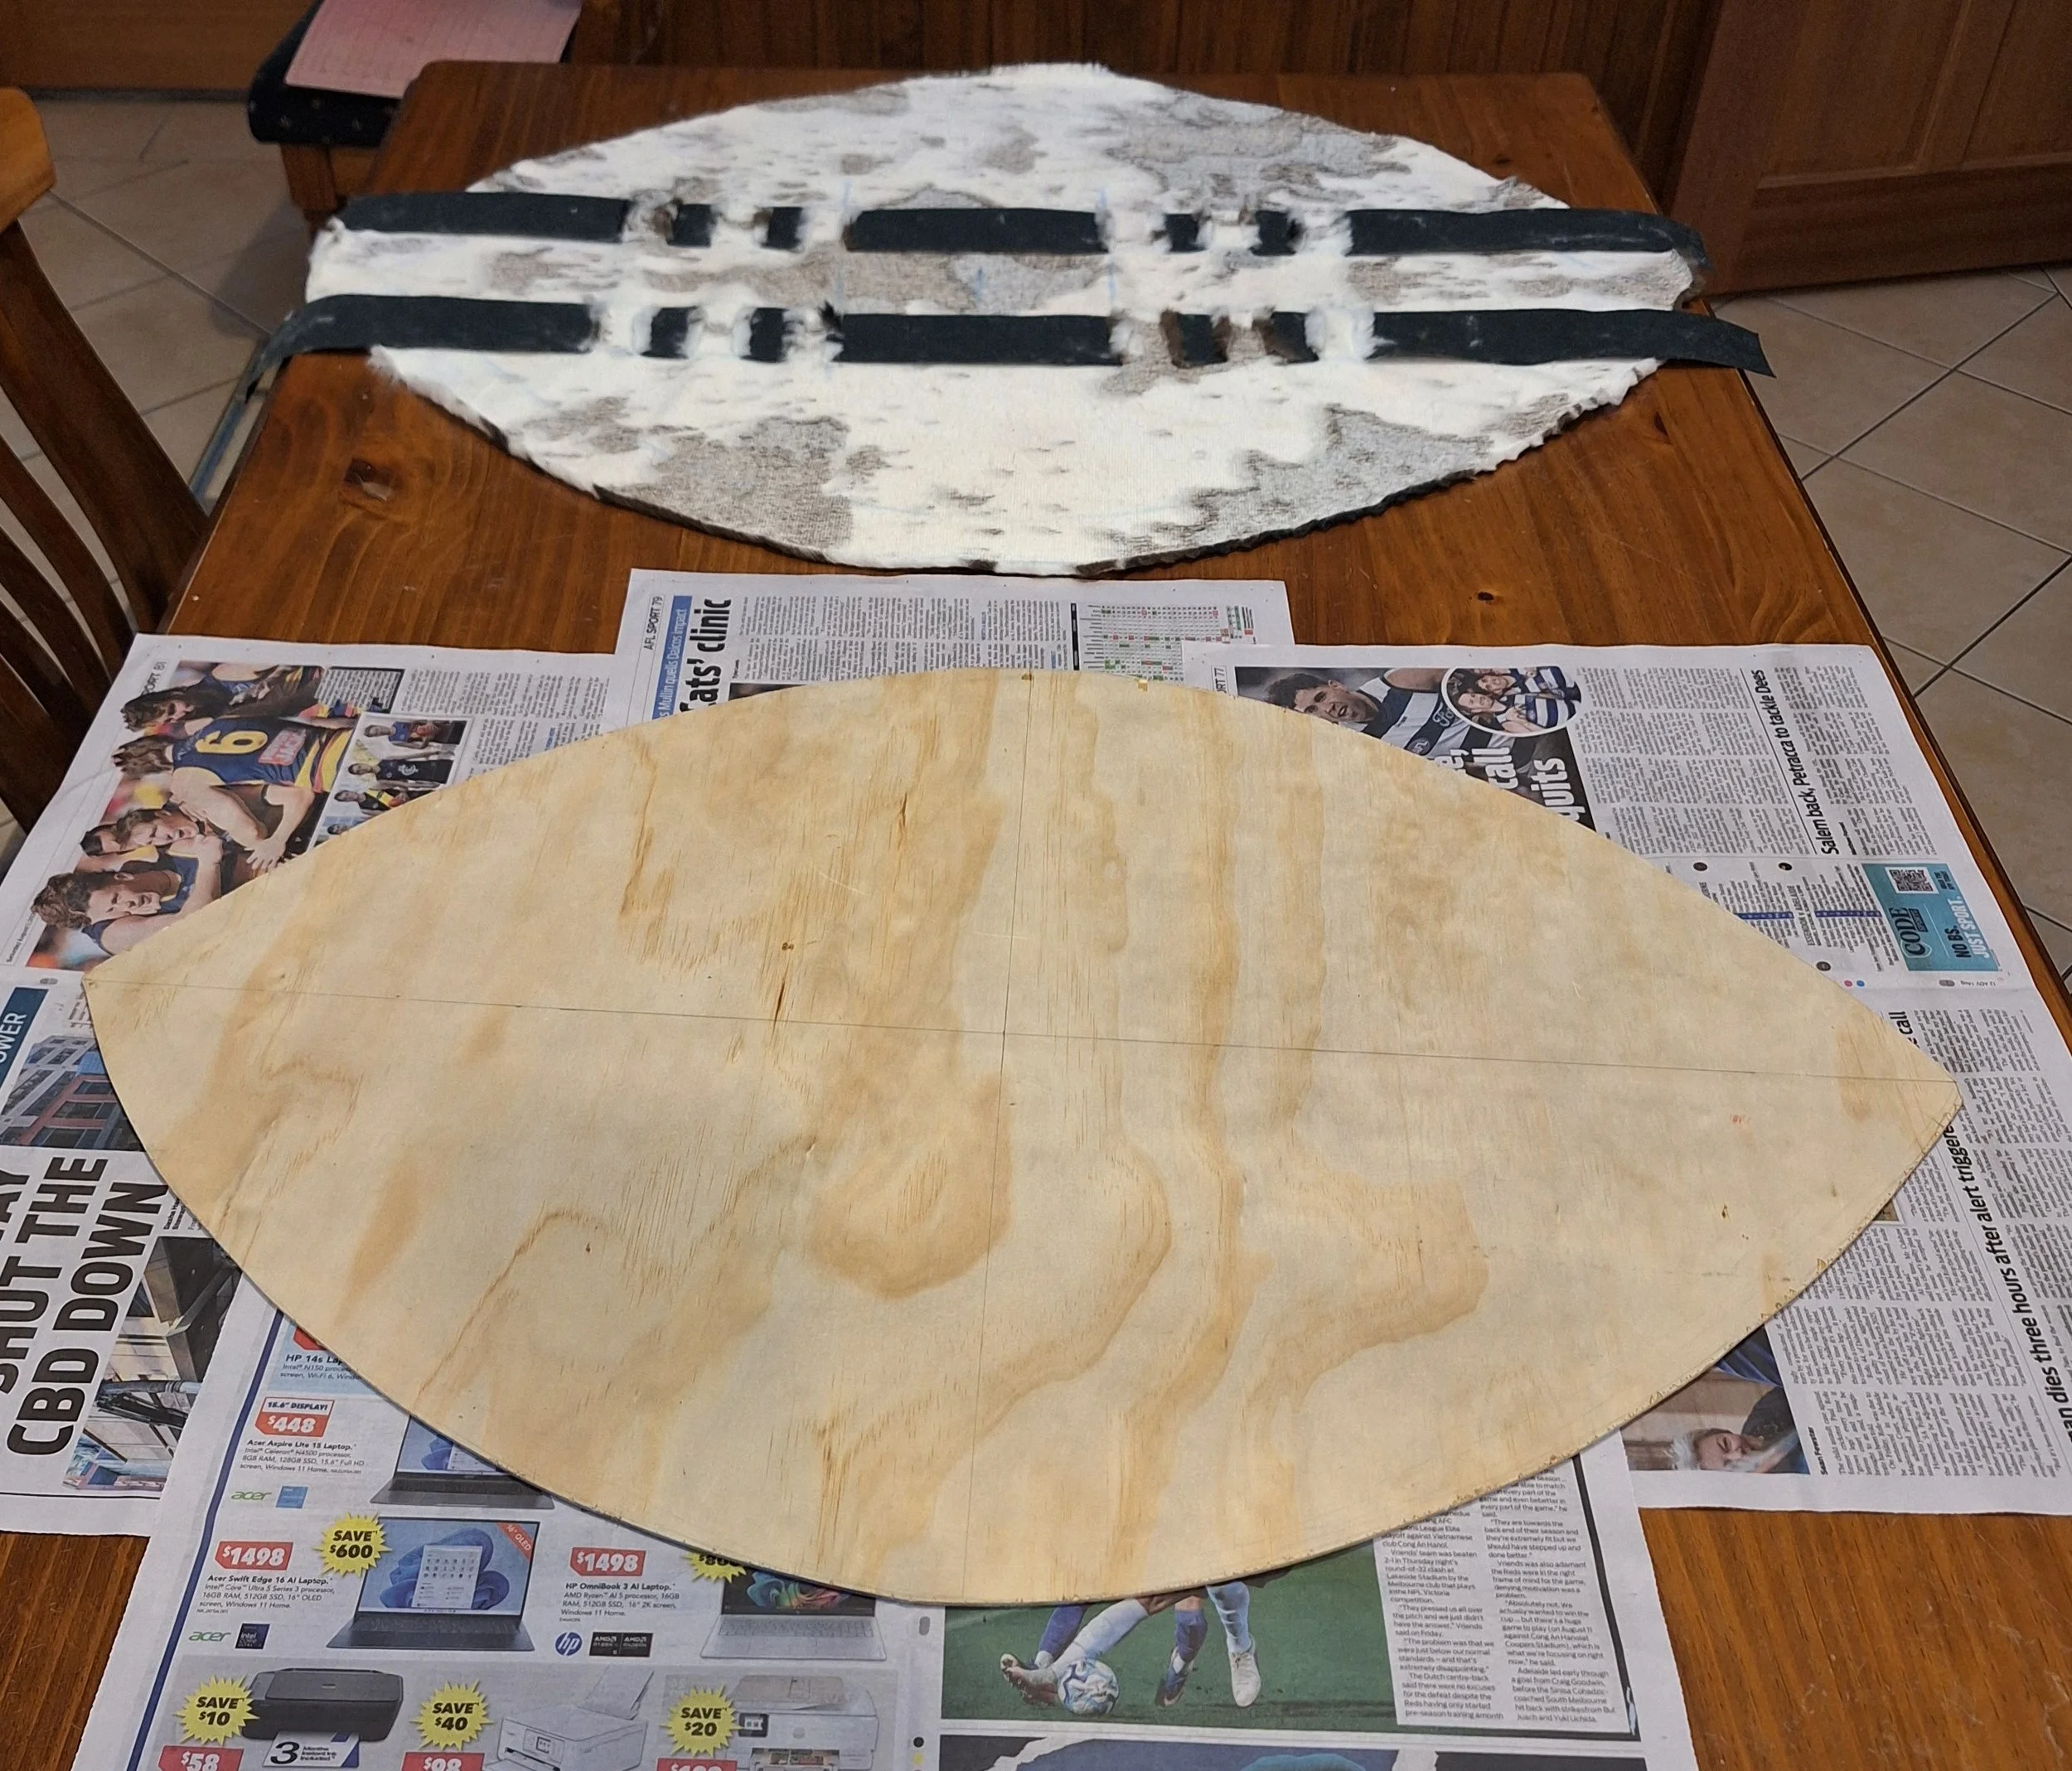
First, the 5 mm thick marine plywood was measured up with pencil to enable a roughly symmetrical ovoid shape to be drawn.
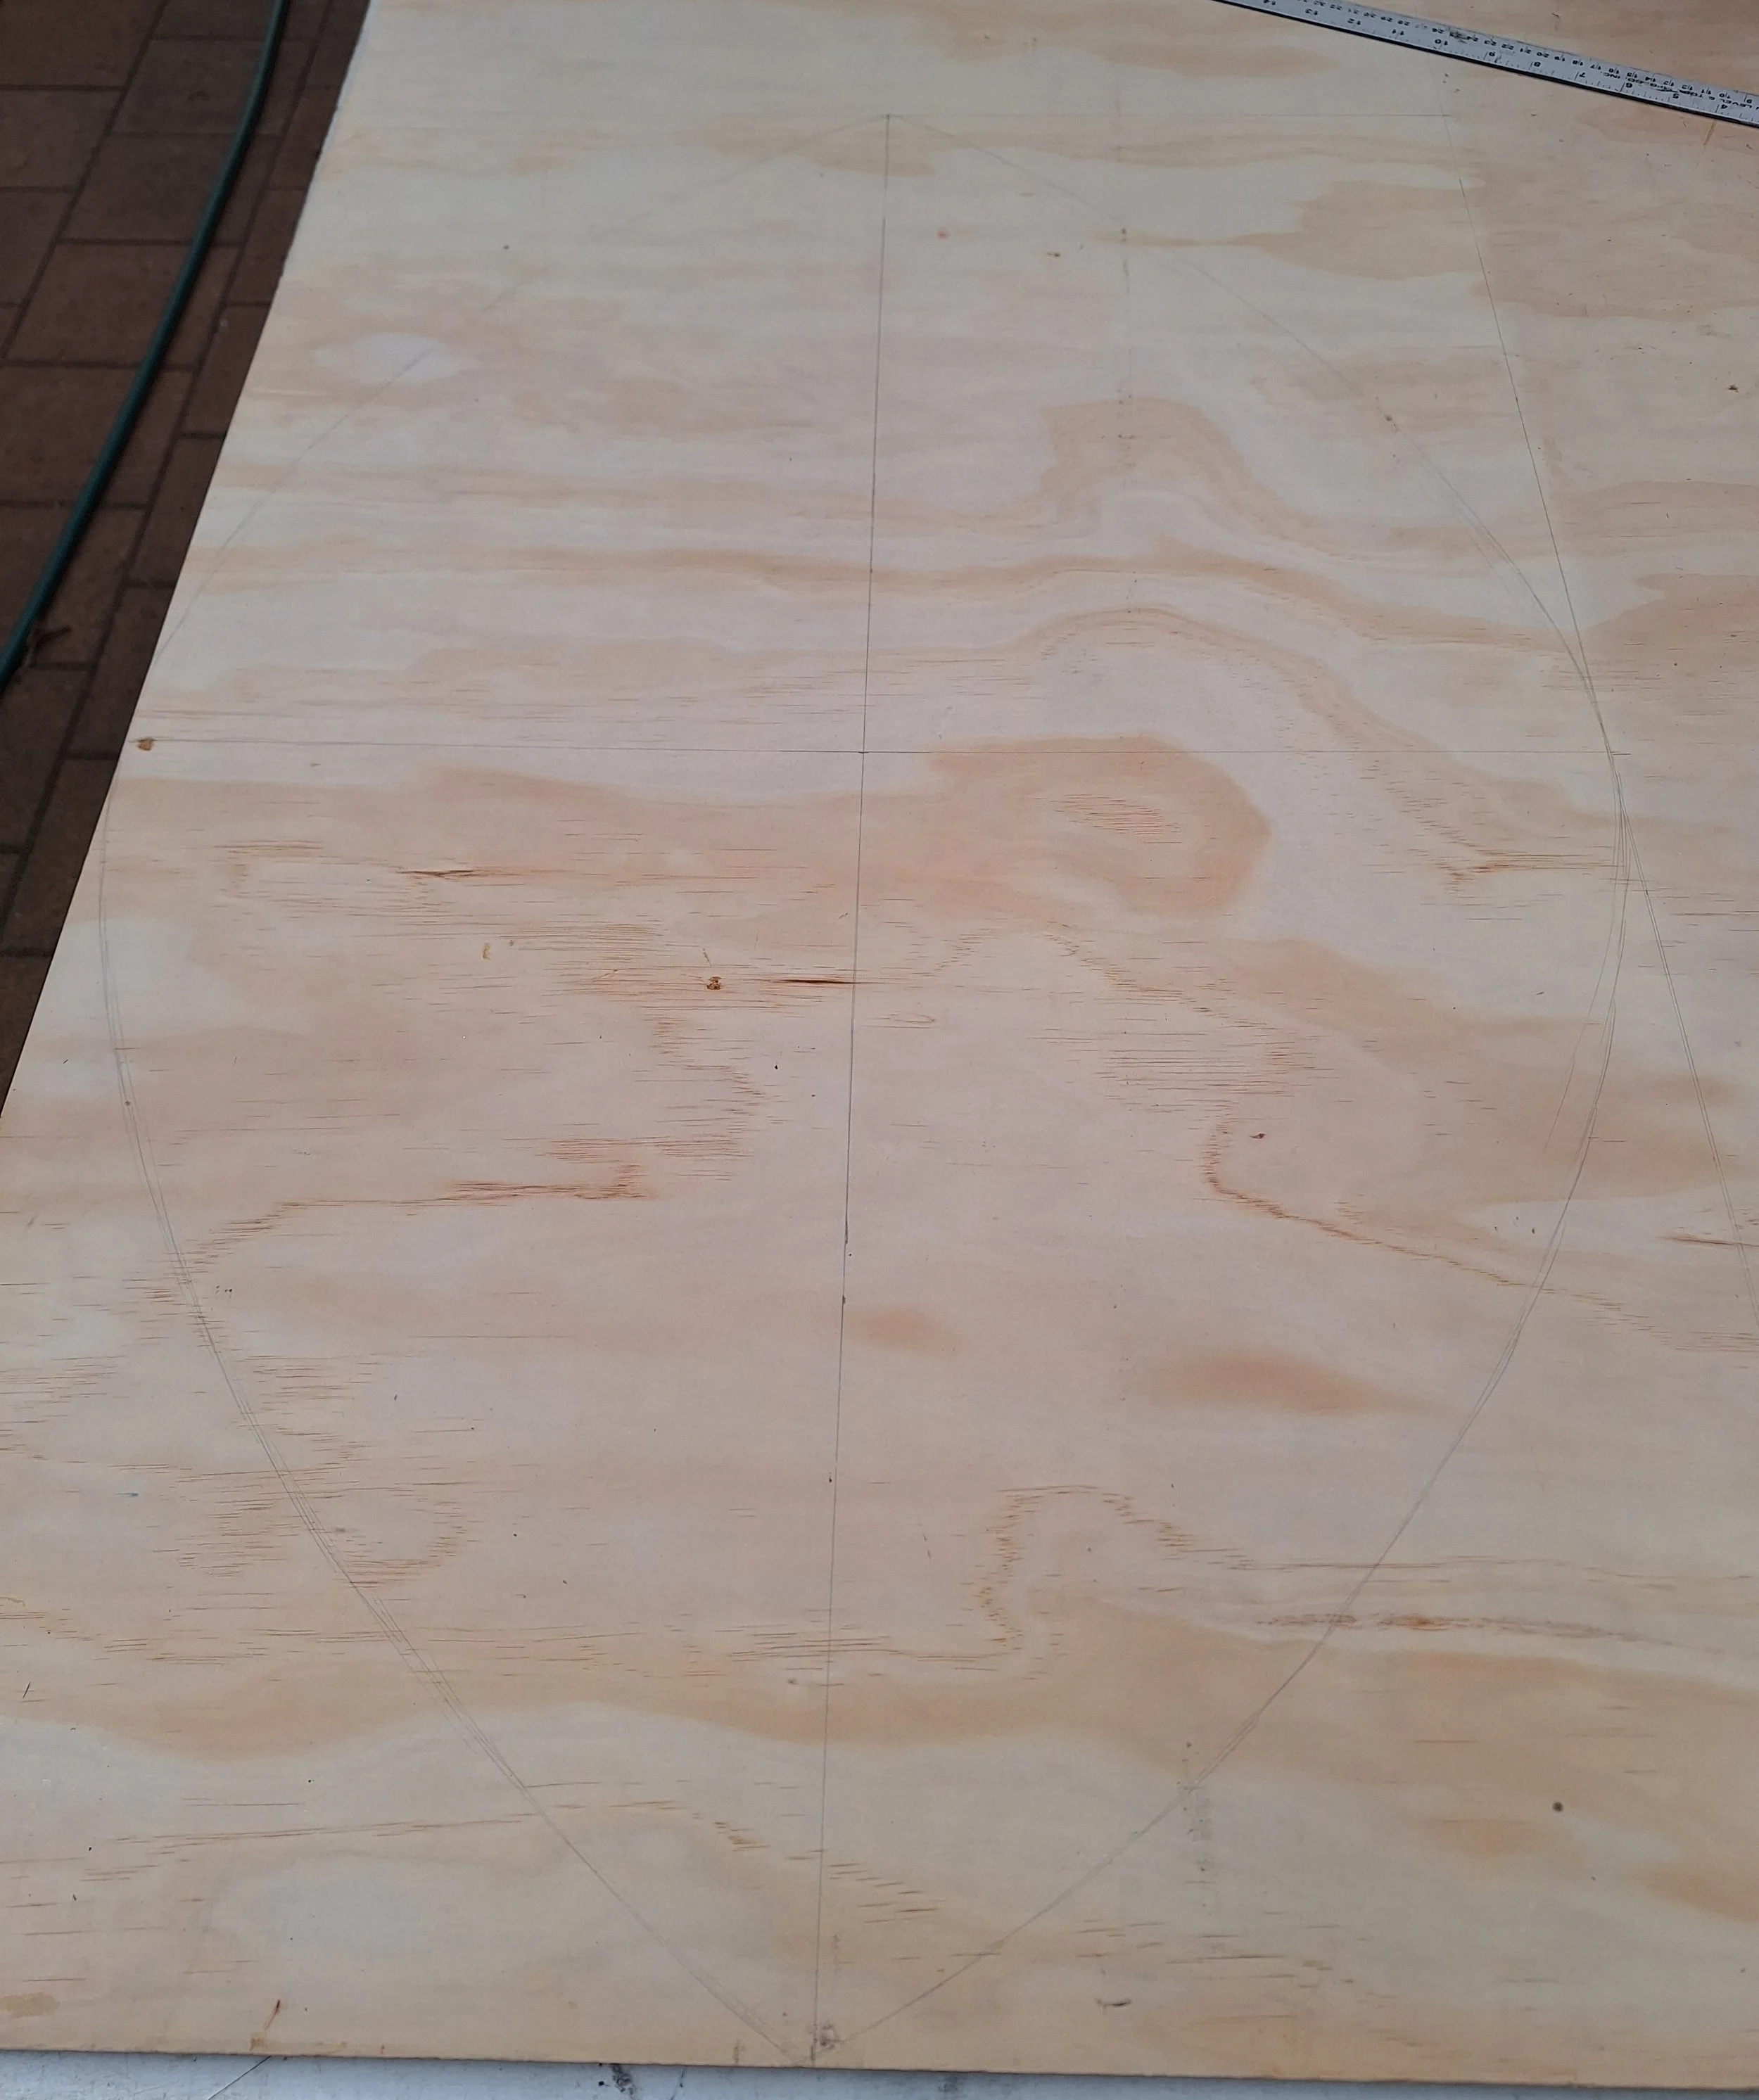
The ovoid shape was drawn free-hand, using vertical and horizontal guide lines. The shape was then cut out with a jigsaw cutter.
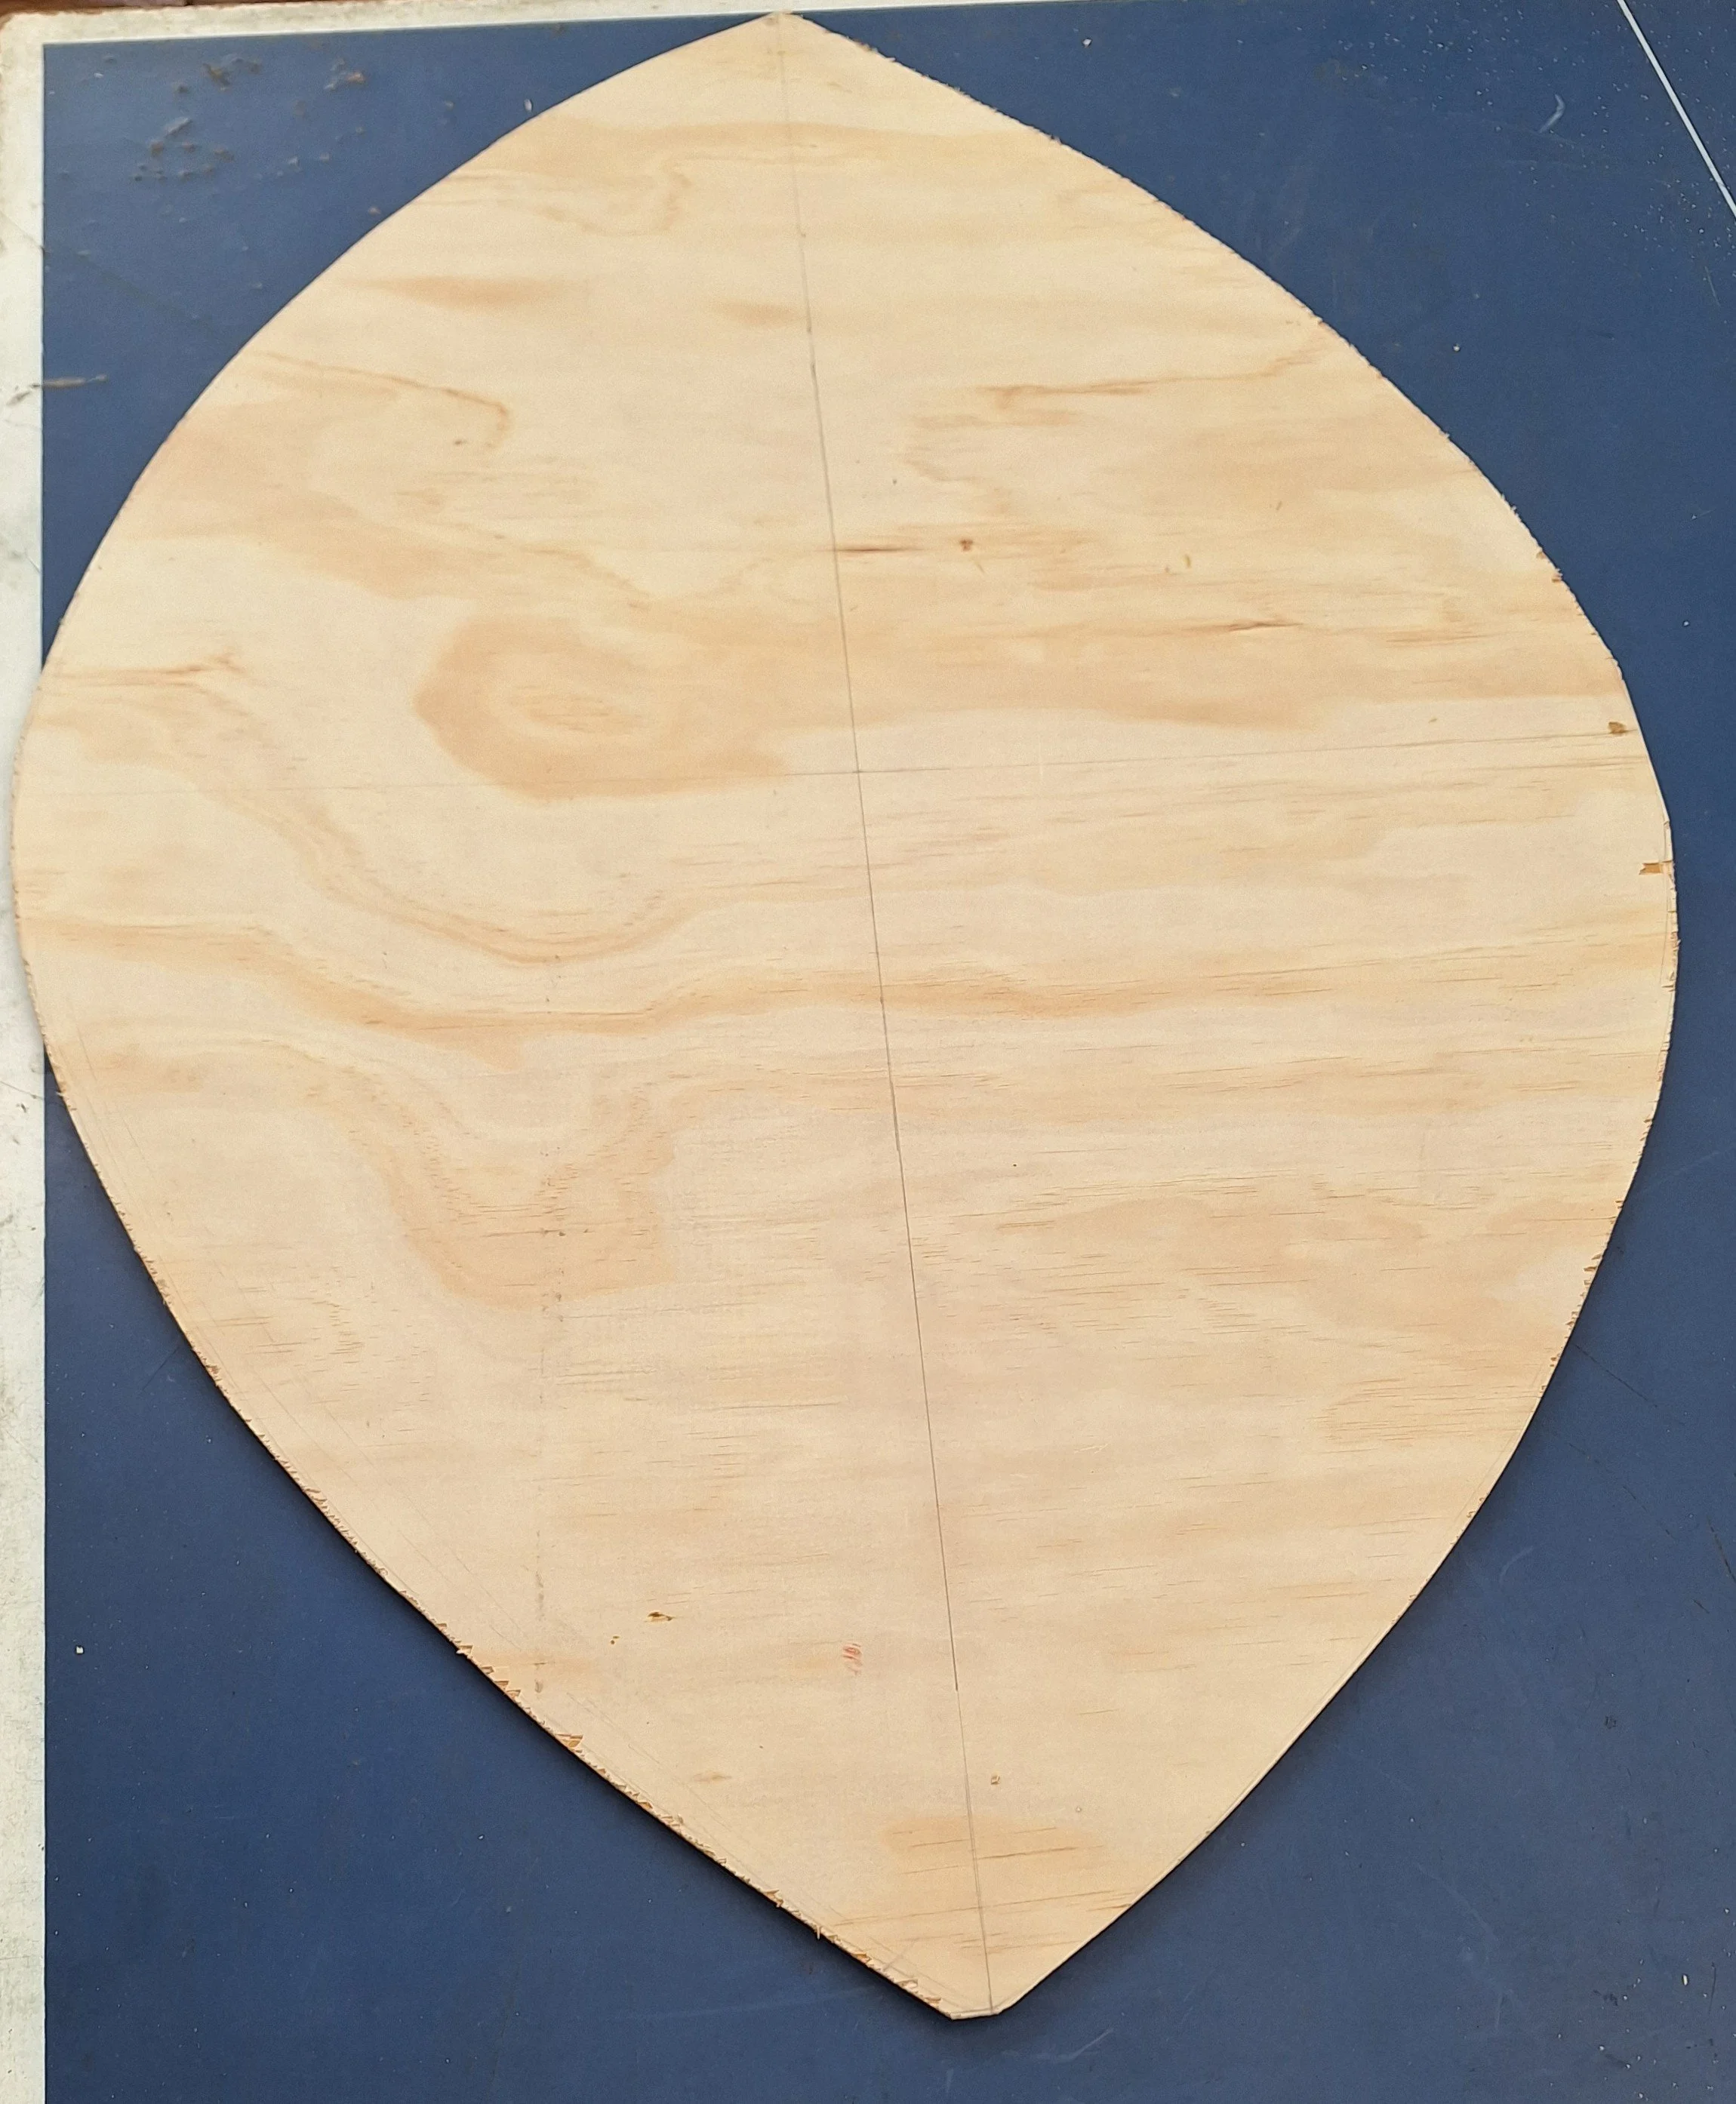
As can be seen in the photographs, the shape is not even nor precisely cut. Since this plywood would be hidden by the faux ox-hide, it was not necessary to be super accurate and historical photographs show real isihlangu are not perfectly evenly made either.
Next, the faux ox-hide and pleather were laid out and inspected for any mistakes, tears or features which would not look good on the shield itself. The faux ox-hide is a brown ‘cow print’ purchased from Spotlight Australia off the roll, as was the brown pleather material. Real isihlangu used hides with varying colours and patterns, as mentioned above, to differentiate regiments and warrior status. There are photographs and drawings of real shields which feature a pattern not dissimilar to the ‘cow print’ used for this replica, so it is not wholly inappropriate colour-wise.
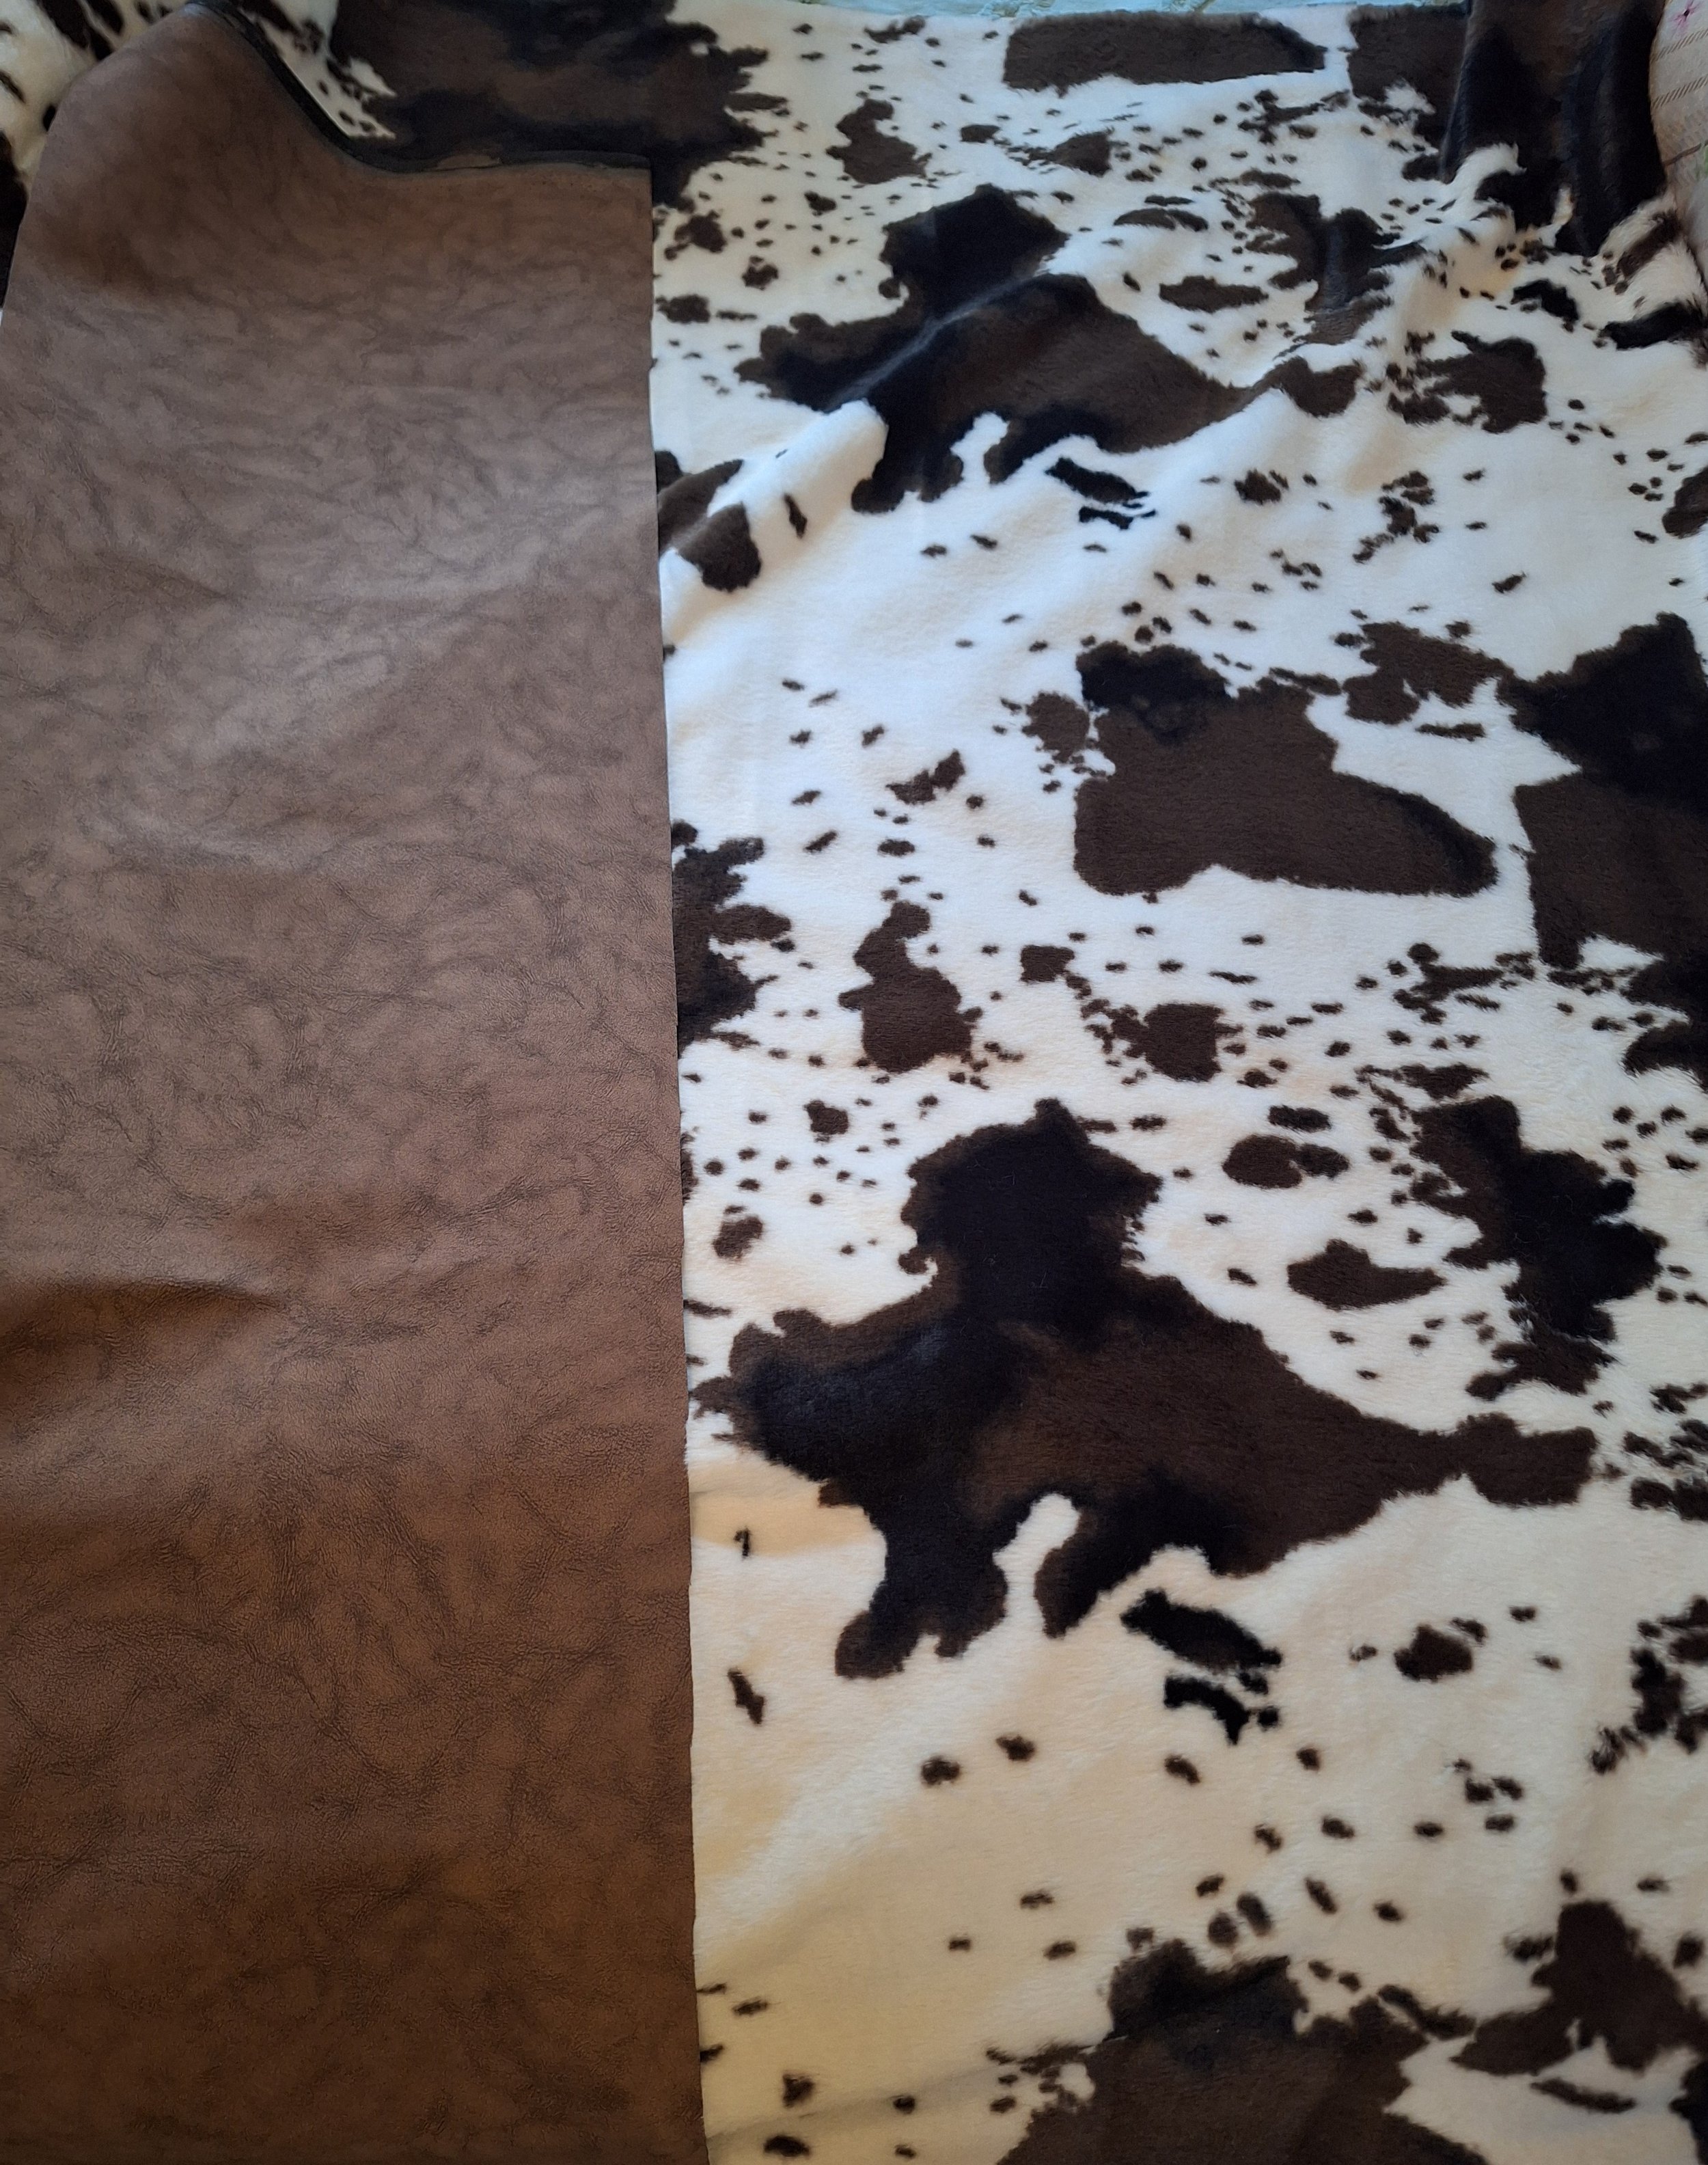
The ox-hide fabric was laid face-down on a table and the wooden plywood board placed over it. Using fabric scissors, the fabric was cut to shape leaving excess of about 5 cm around the sides. The location of the board was marked on the back of the fabric with dressmaker’s chalk. This was done to make the placement of the vertical pleather strips easier.
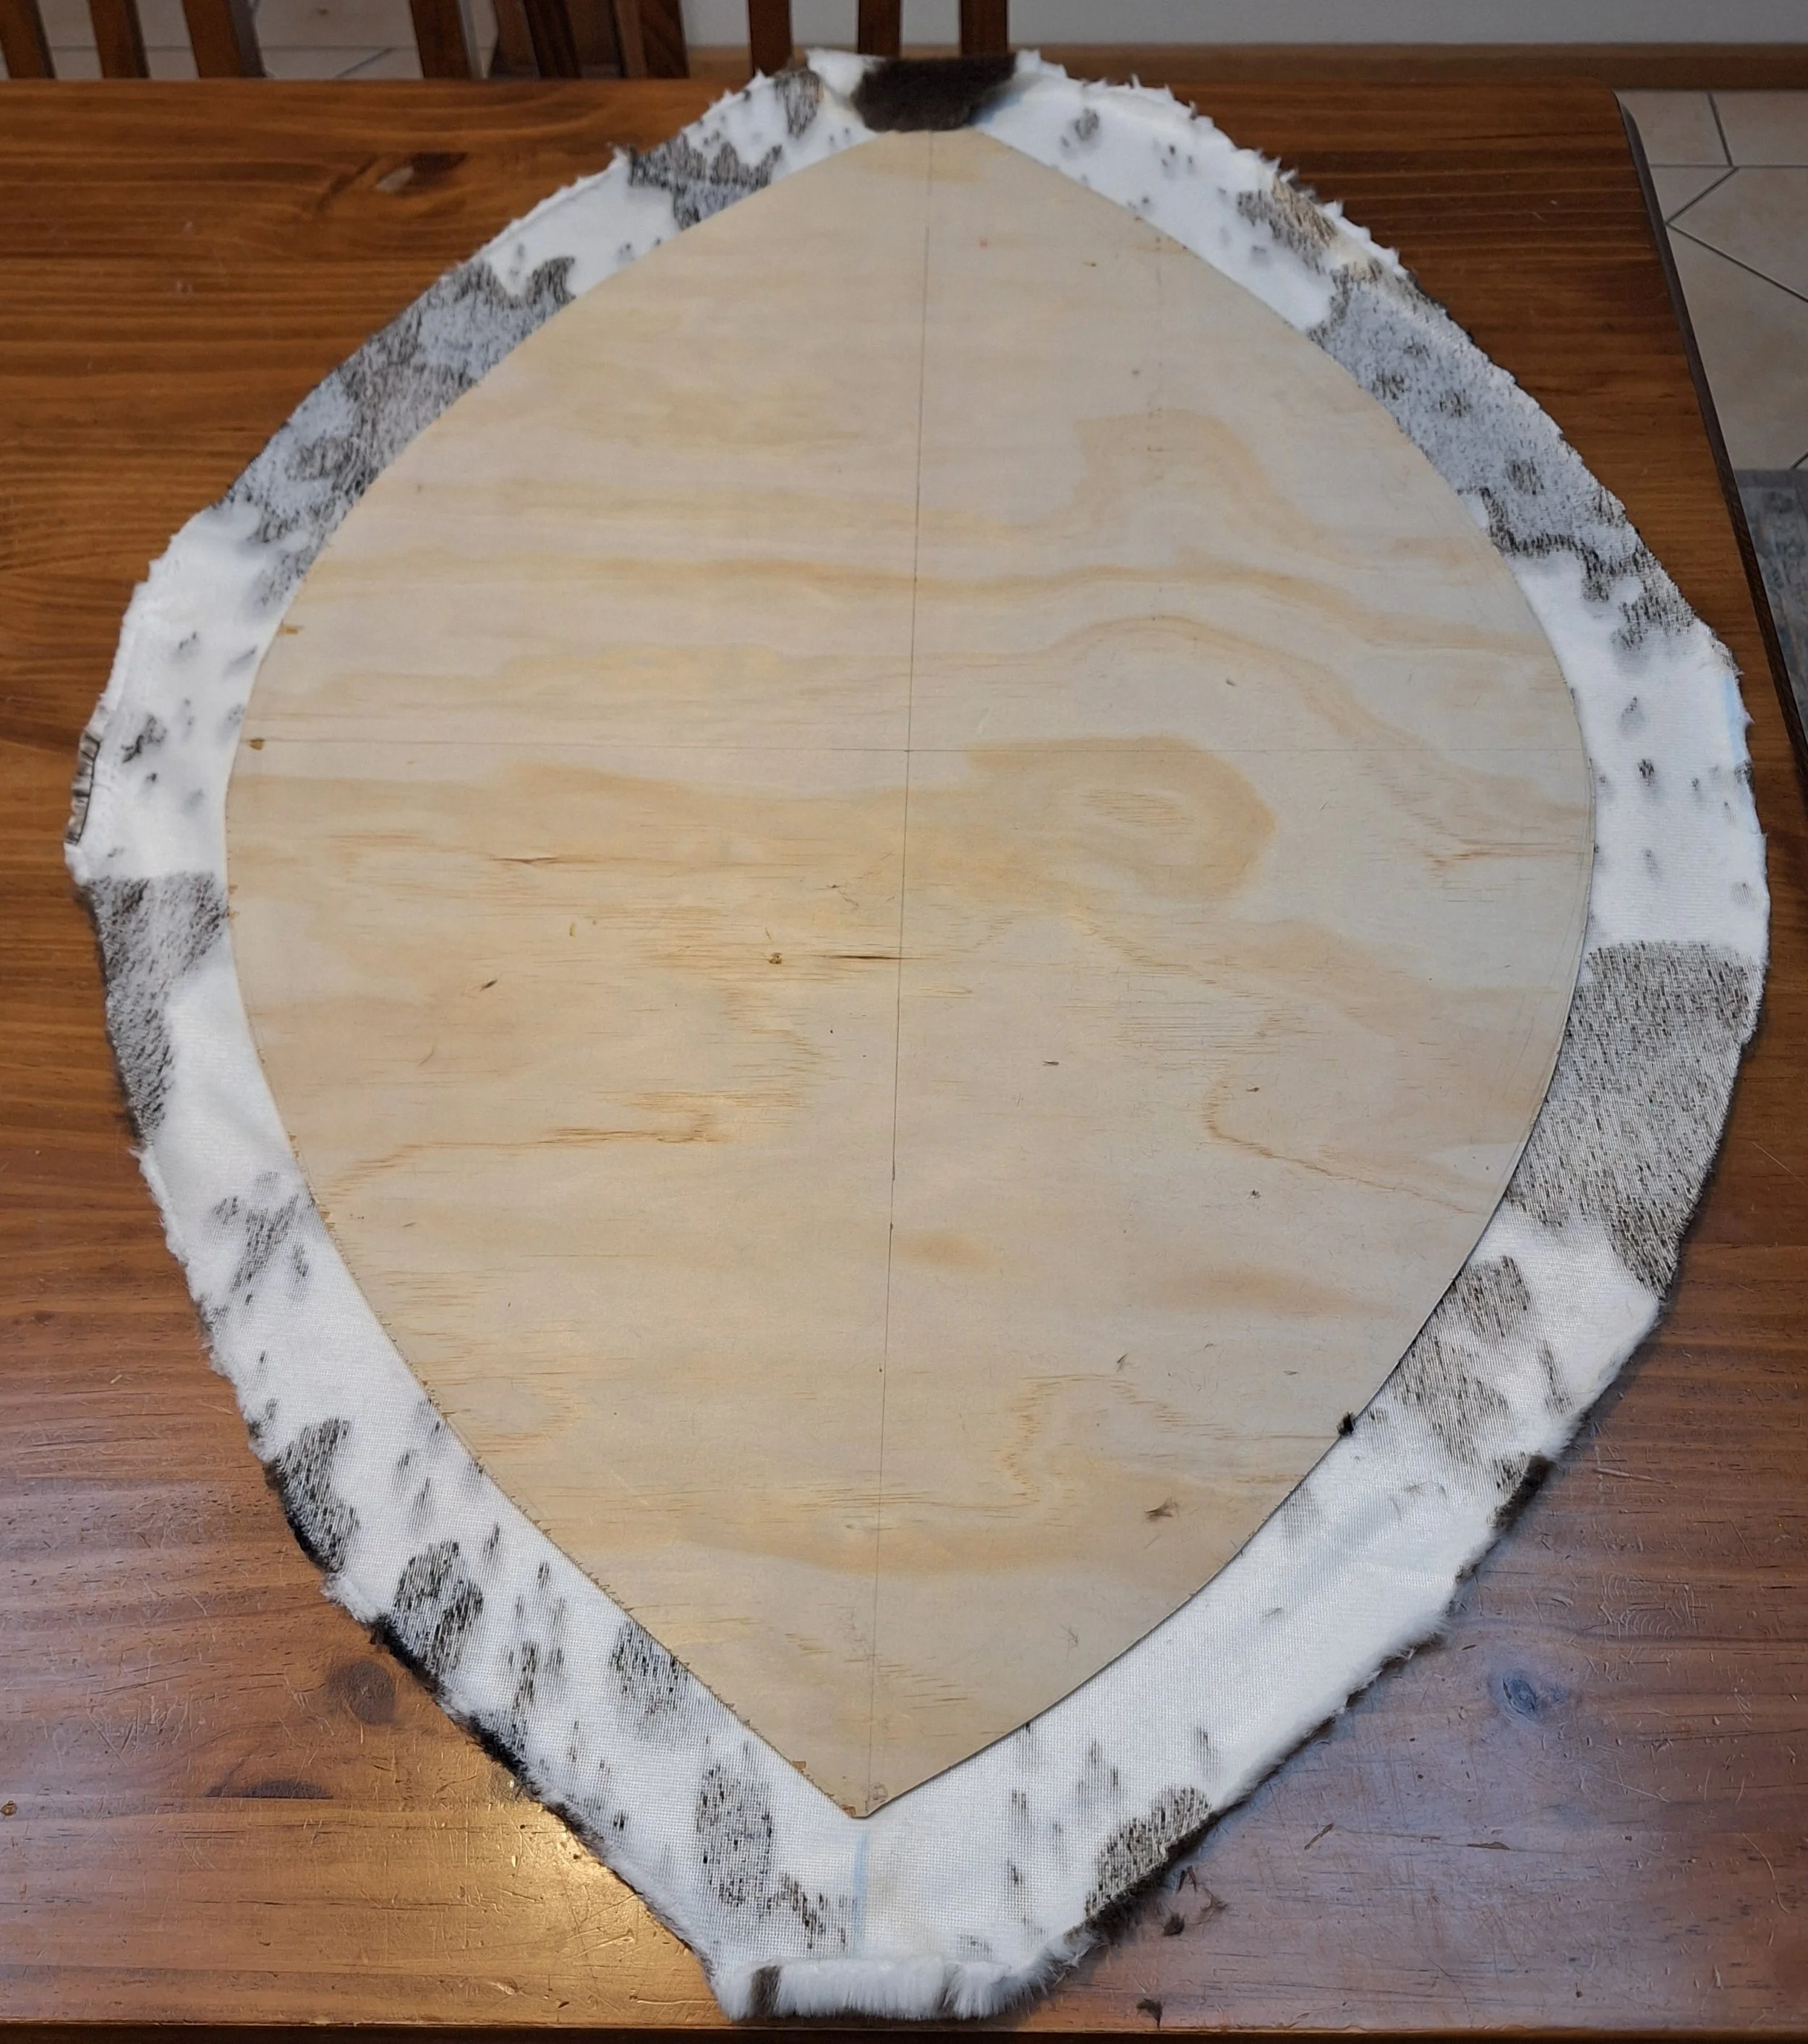
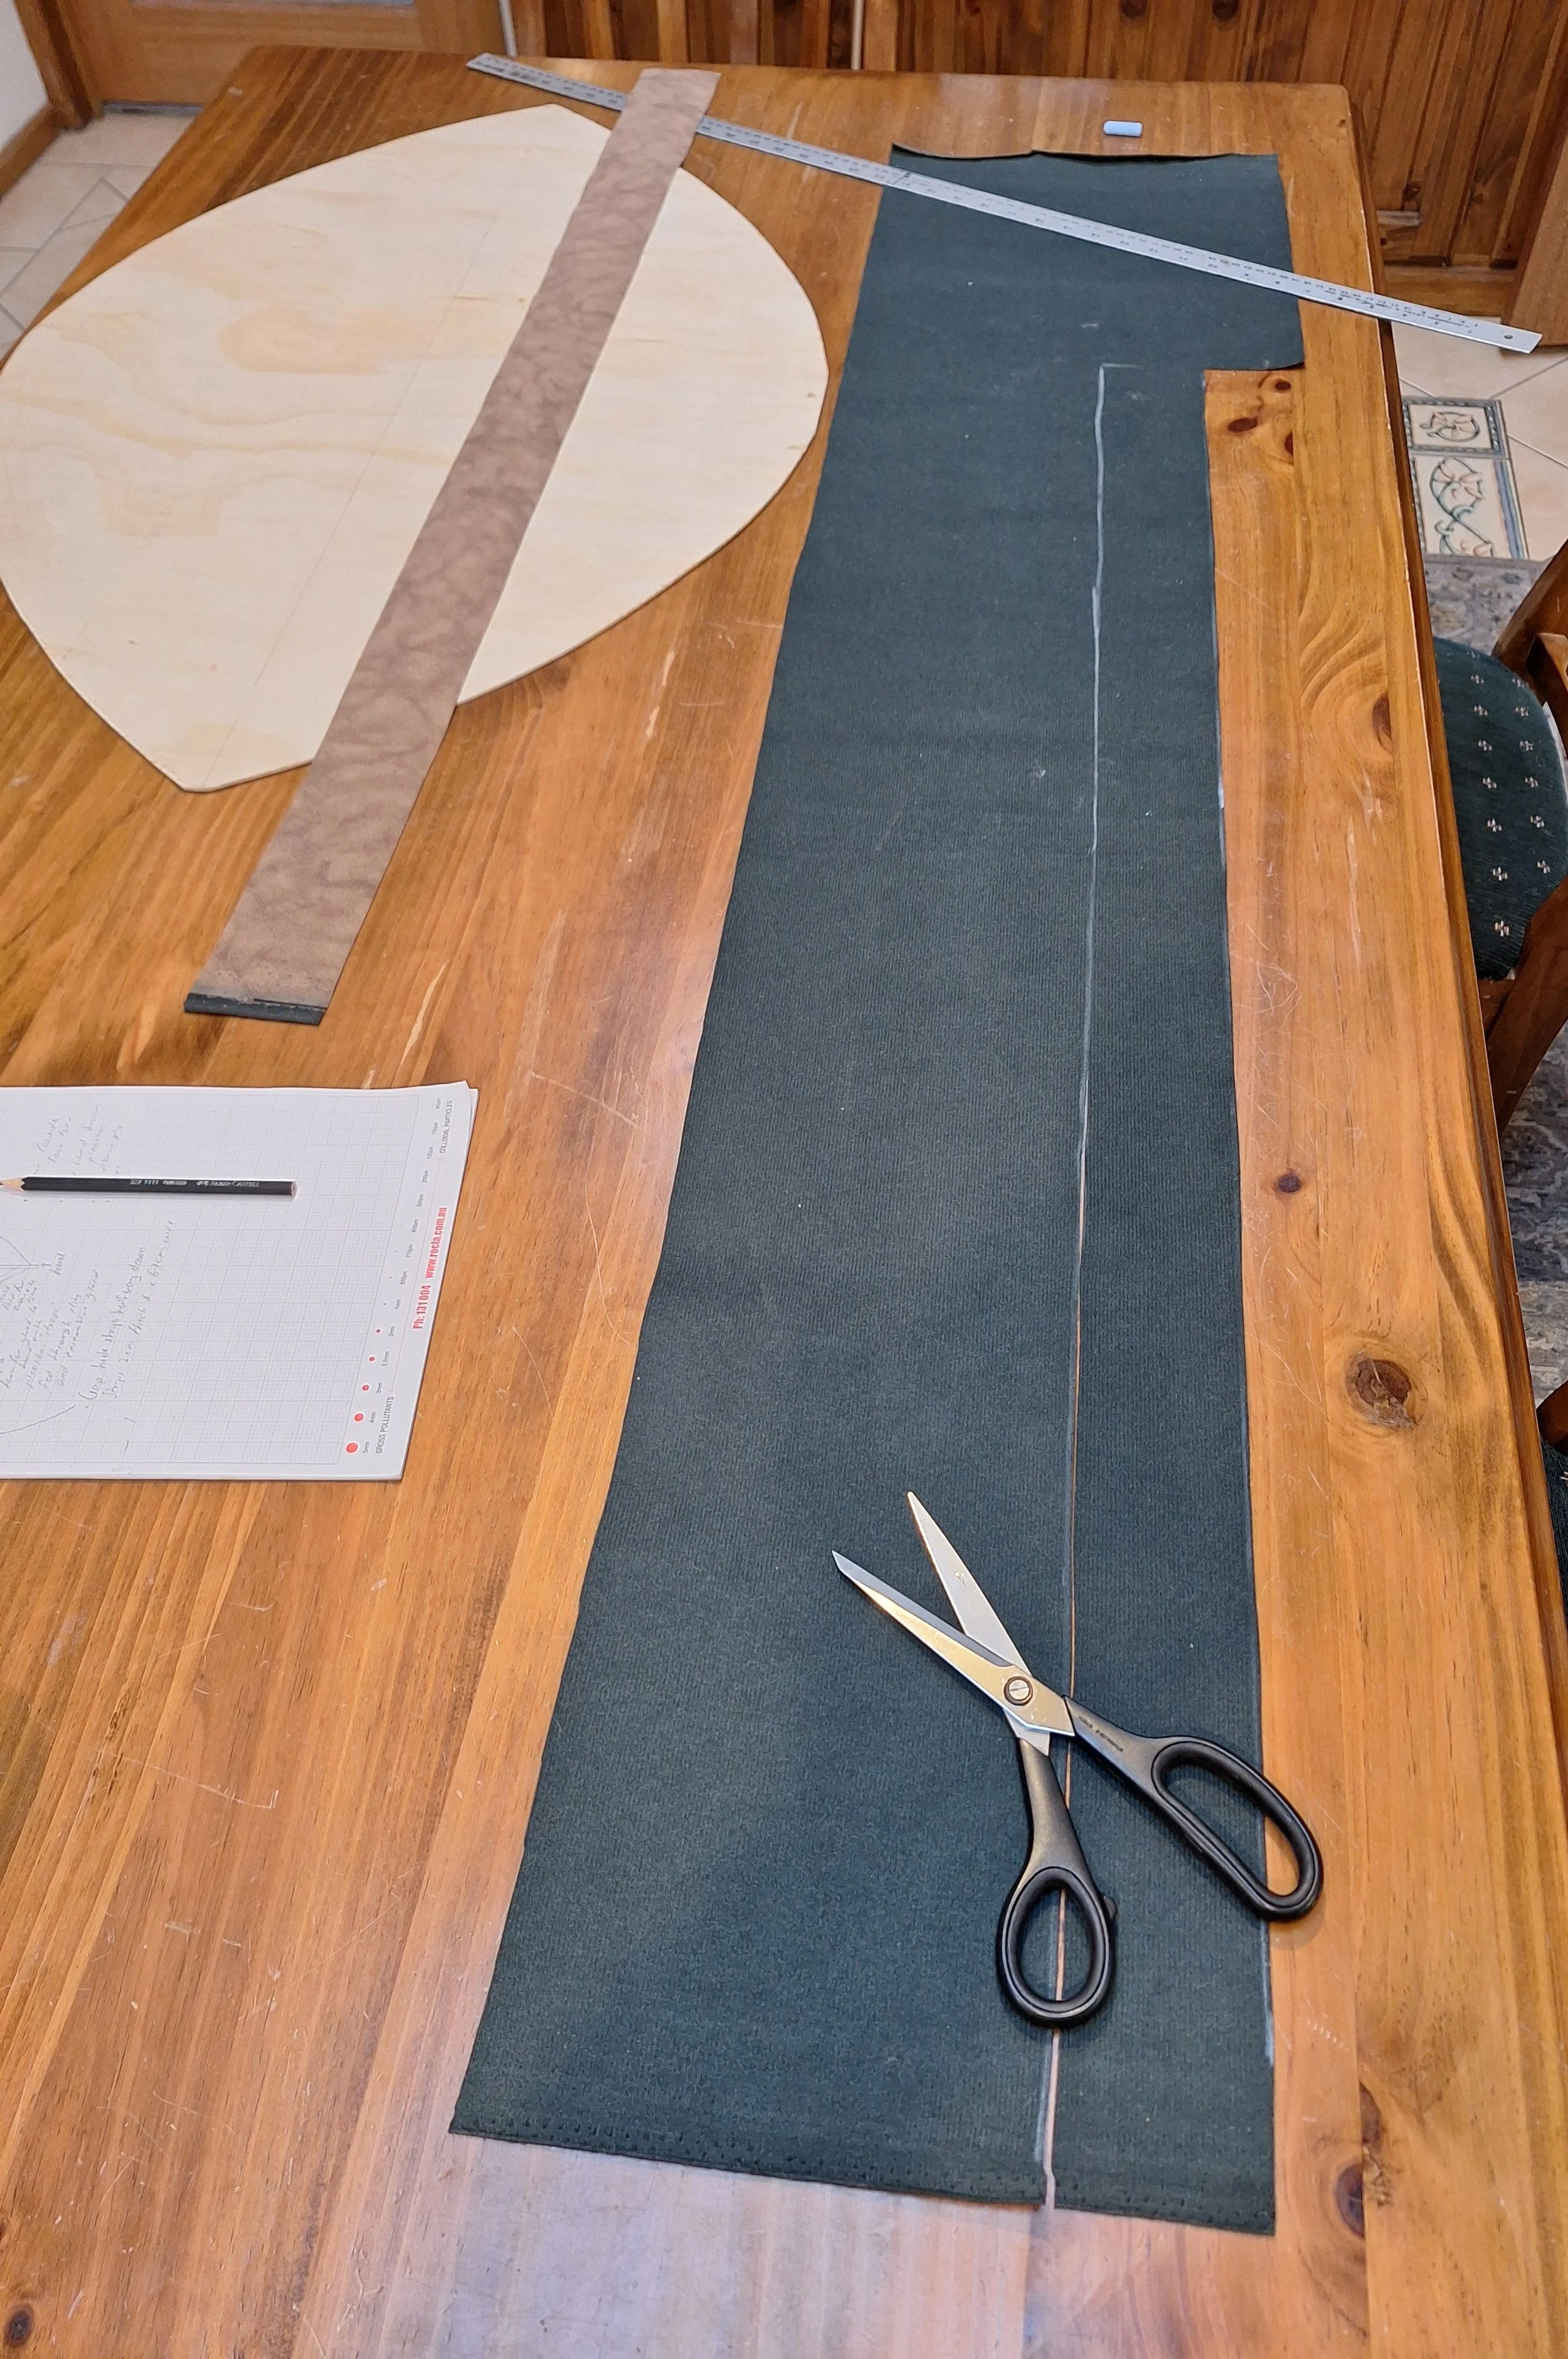
Next, the pleather was measured out to about 7 cm wide strips cut longer than the wooden board, using dressmaker’s chalk on the back for cutting guidelines. Two pieces were then cut.
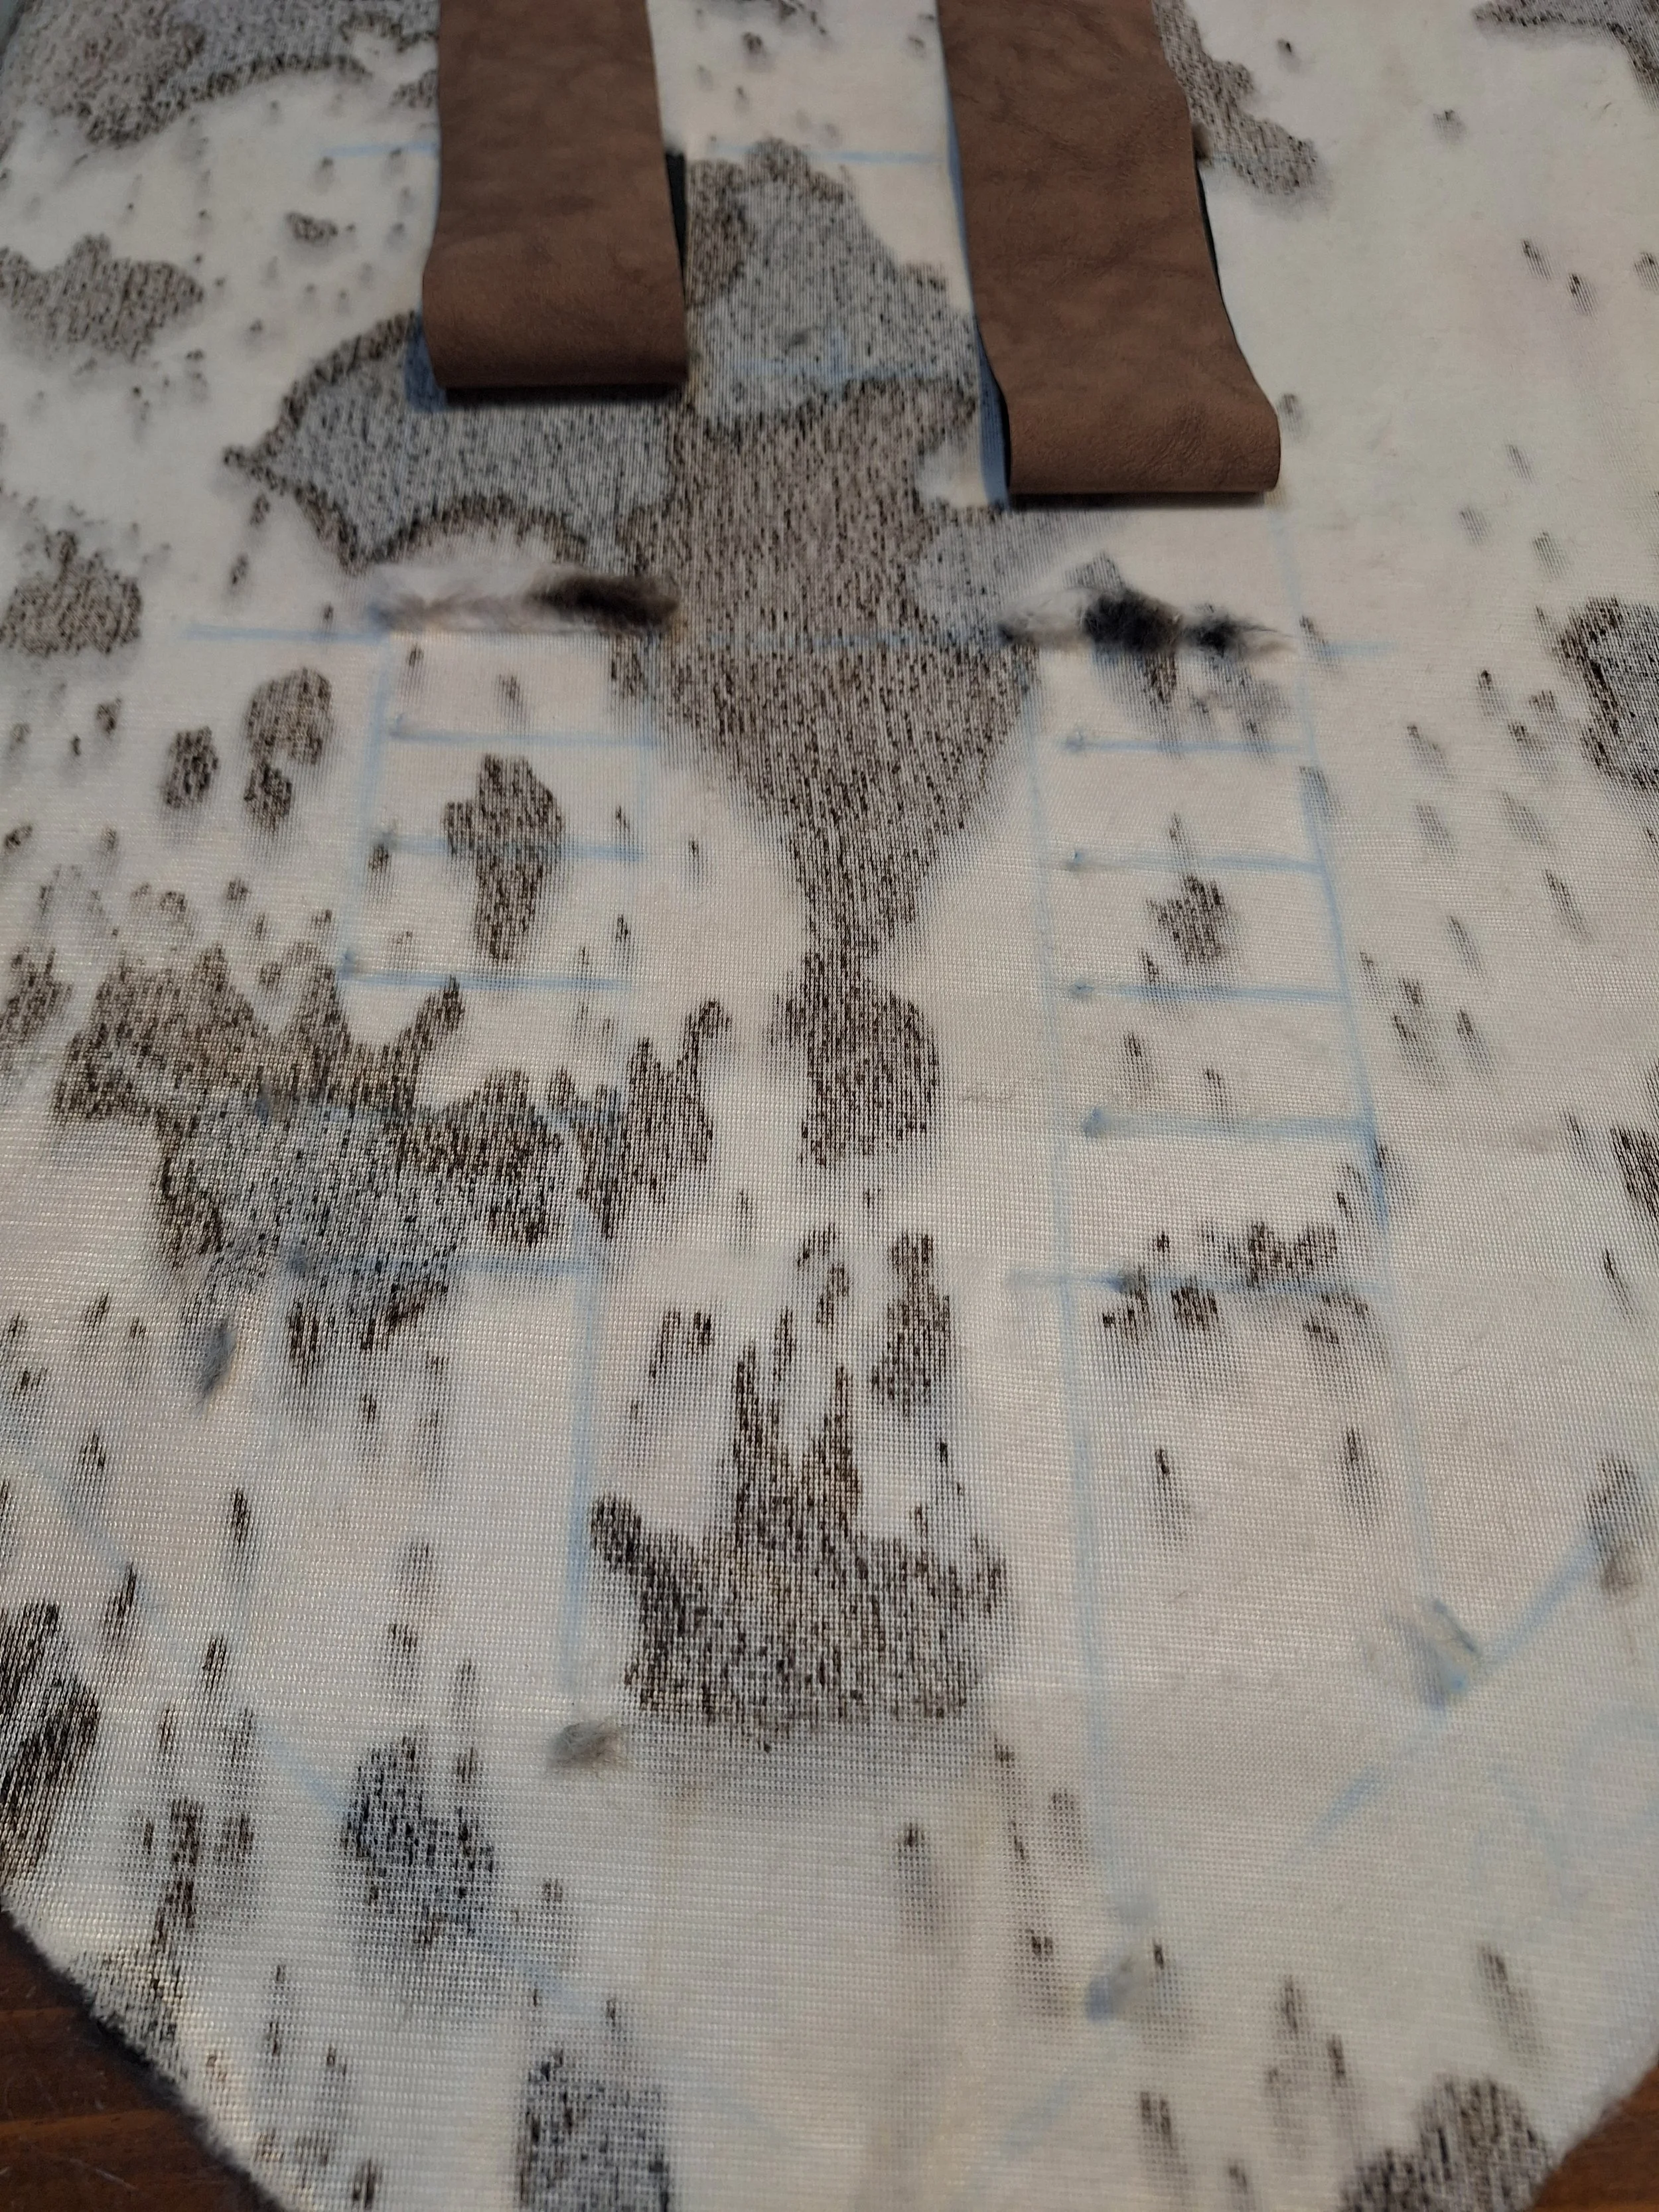
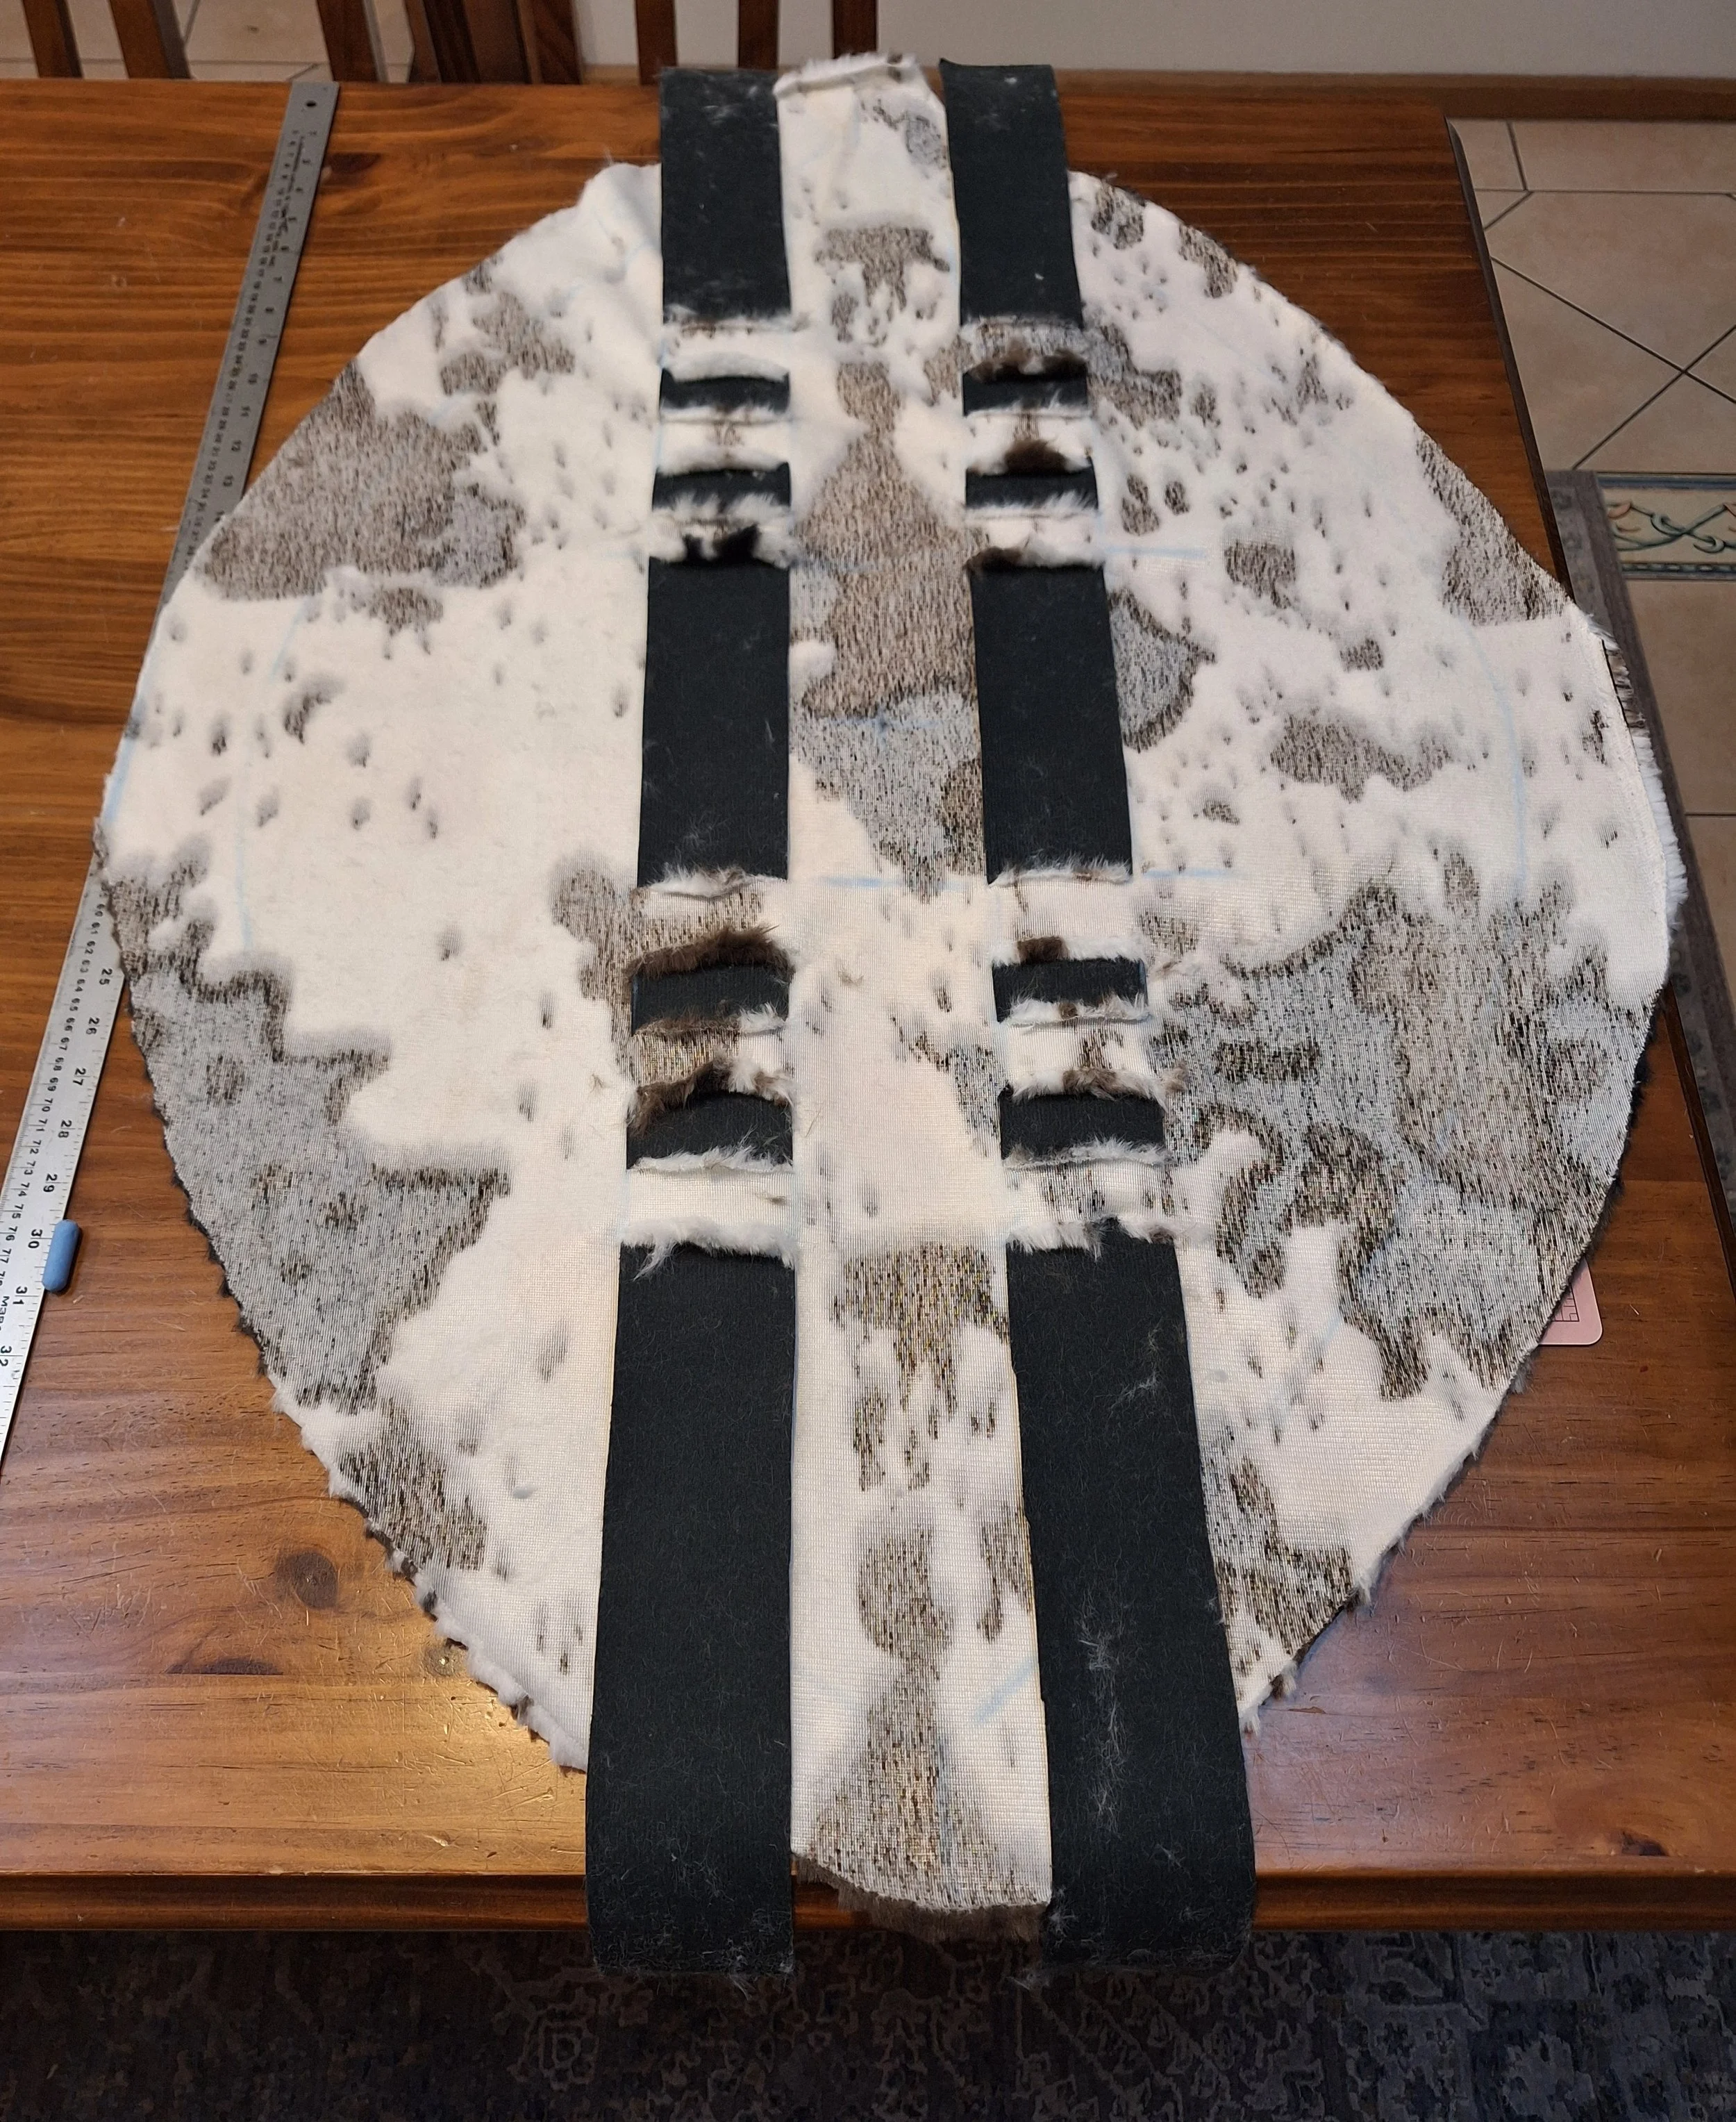
Using the shape drawn on the back of the ox-hide fabric in dressmaker’s chalk, further construction lines were drawn to evenly place the pleather strips vertically on the shield face. Additional horizontal lines were then drawn to ensure the straps would be visually roughly the same thickness and evenly spaced. Cuts were then made using a hobby knife into the back of the ox-hide fabric, to enable the pleather to be woven through.
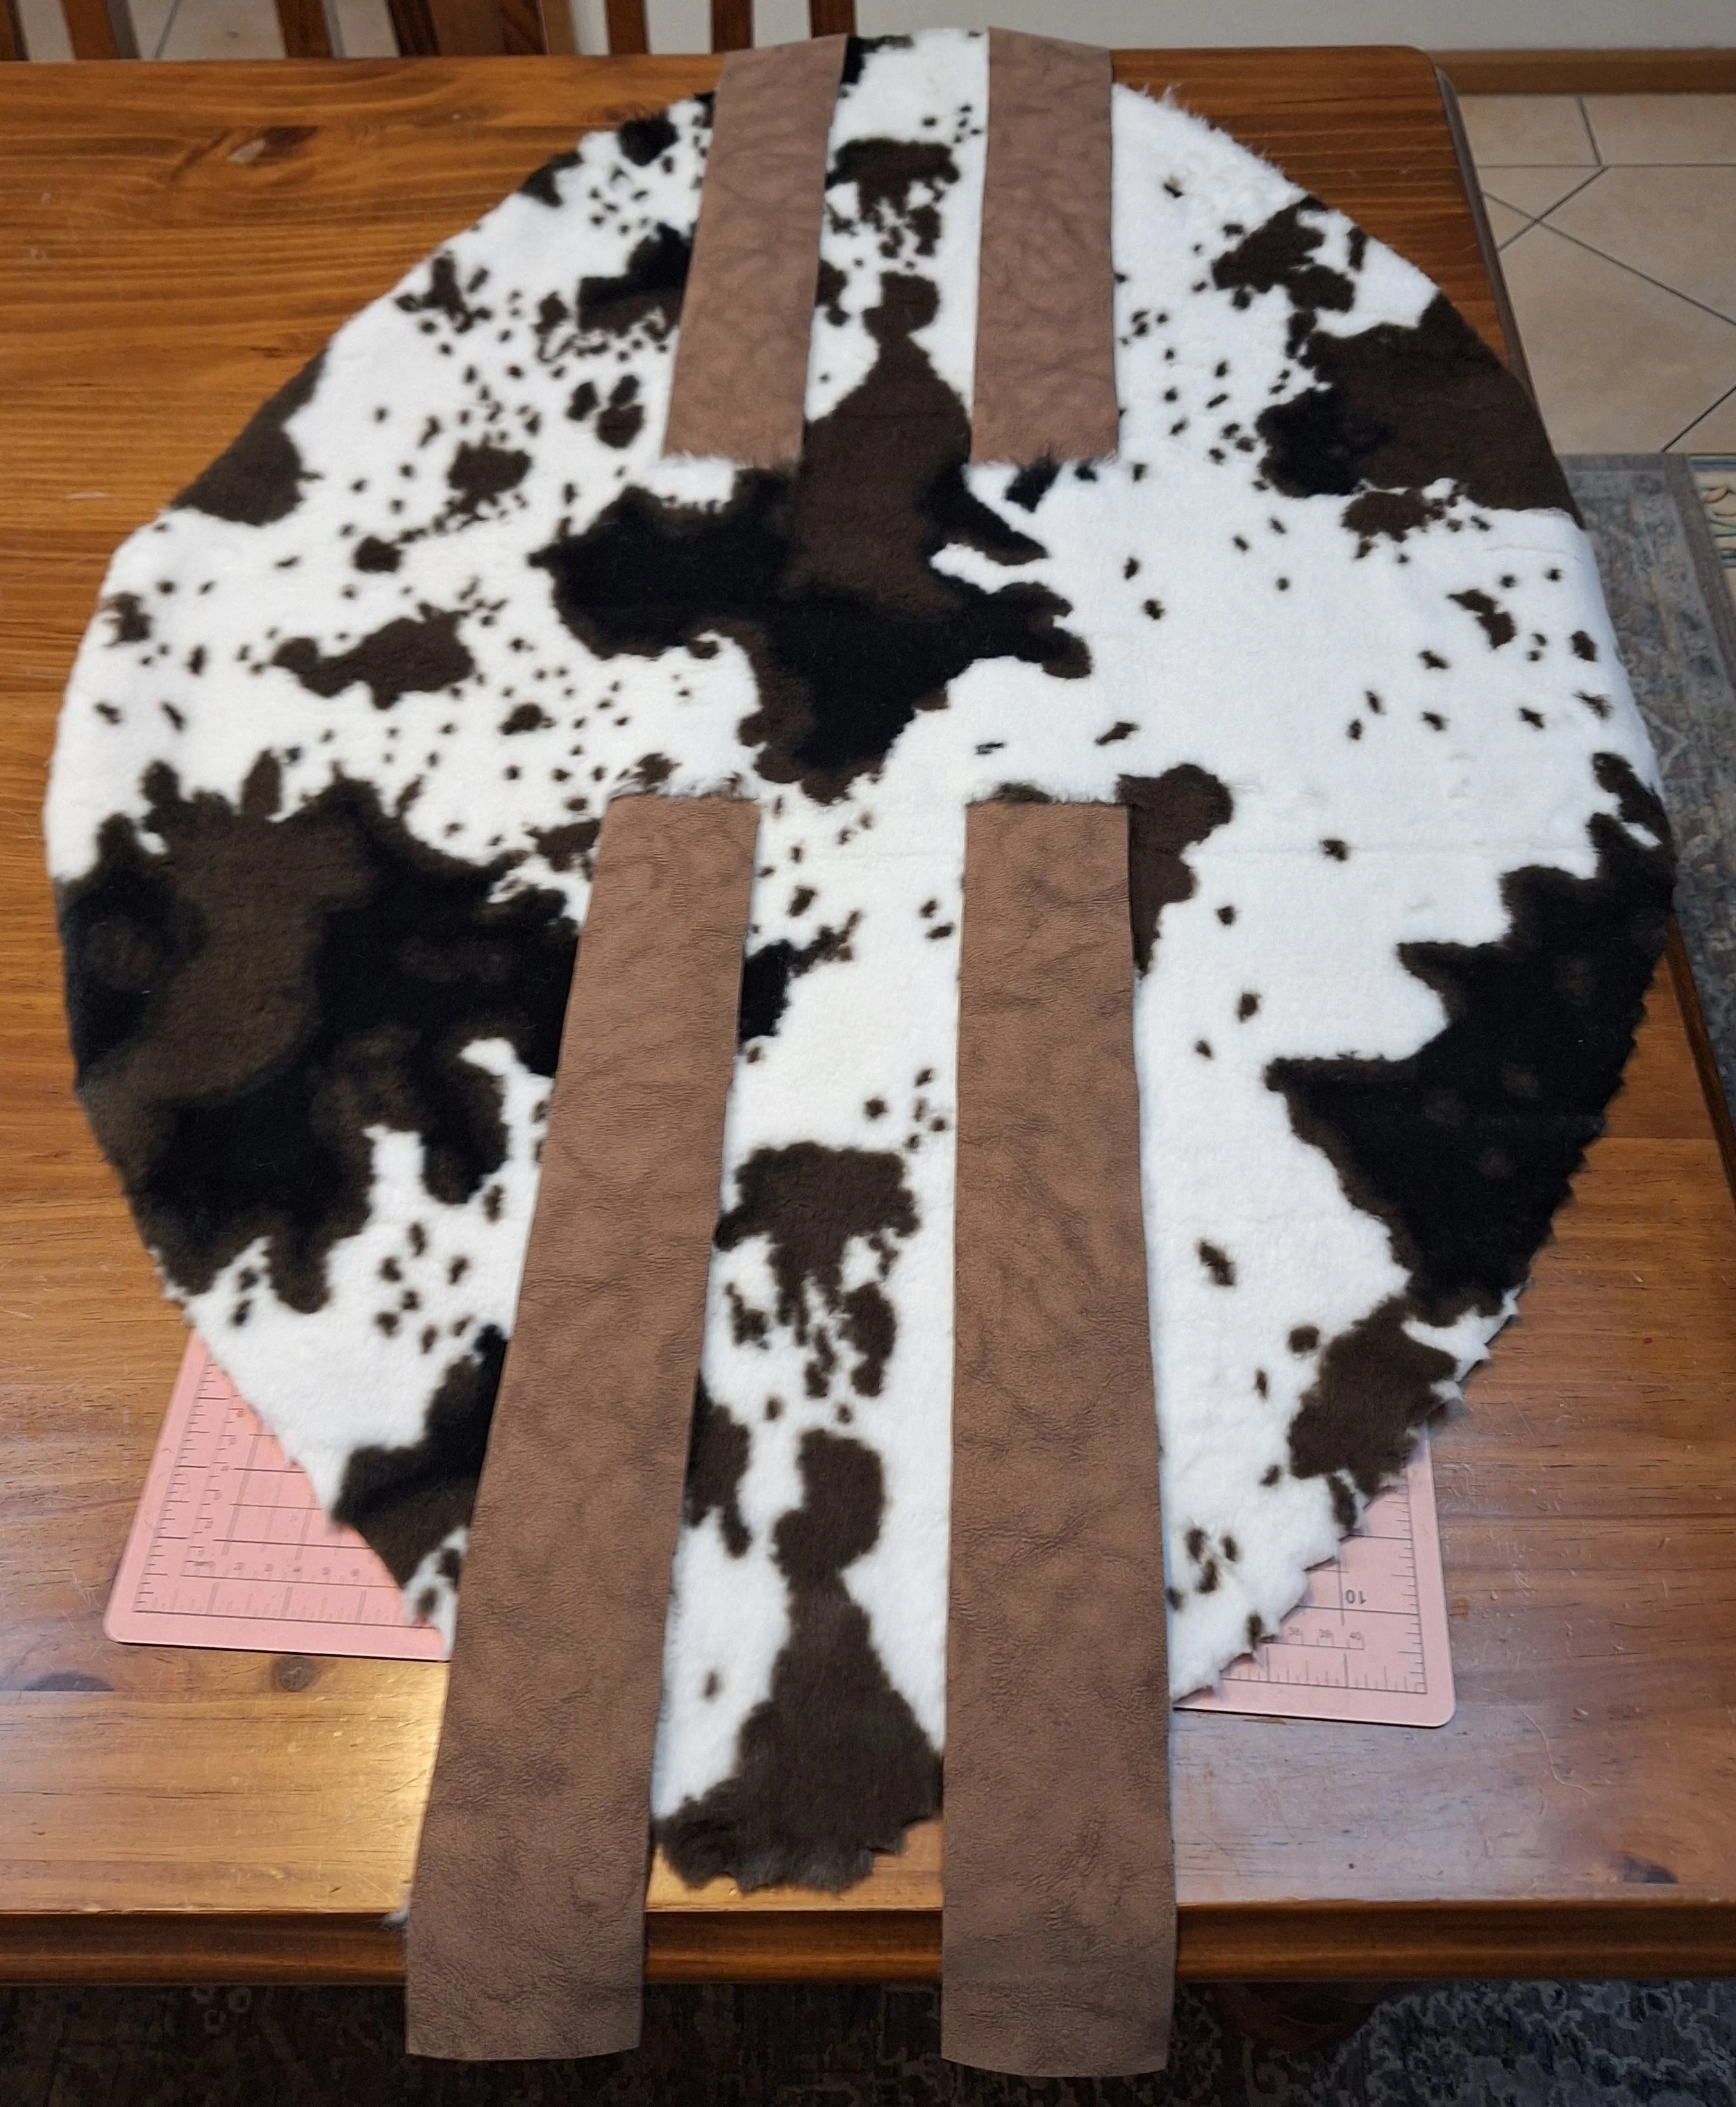
You will note on photographs of real isihlangu that there is often (but not always) a horizontal gap in the strapping about the middle of the shield. This was often to accommodate a different style of loop handle or horizontal stick for added strength on the rear side. This effect was recreated on the replica, as shown below.
Following the weaving-through of the pleather strips, the rear side of the fabric looked like this, showing the ‘gap’ which would appear on the face of the shield.
With the weaving complete, the fabric was then glued to the plywood board using a general purpose wood glue. The glue was spread evenly on the wooden board before being turned over and placed on the fabric using the dressmaker’s chalk lines to place it evenly. Stacks of books were then placed on top of the board to press it down and ensure contact, and the ensemble was left overnight to dry under the weight of the books.
The following day, a length of dowel cut to longer than the shield itself by 10 cm at both ends was then secured to the back of the board using a hot glue gun. Then, the excess pleather strips were folded over it and hot glued into place for added strength. The excess ox-hide fabric was then cut down, before being hot glued in place as well.
To accommodate the stick at both ends and ensure the fabric excess could be folded evenly, slits were made in the fabric from the edge to where it met the plywood all the way around the shield.
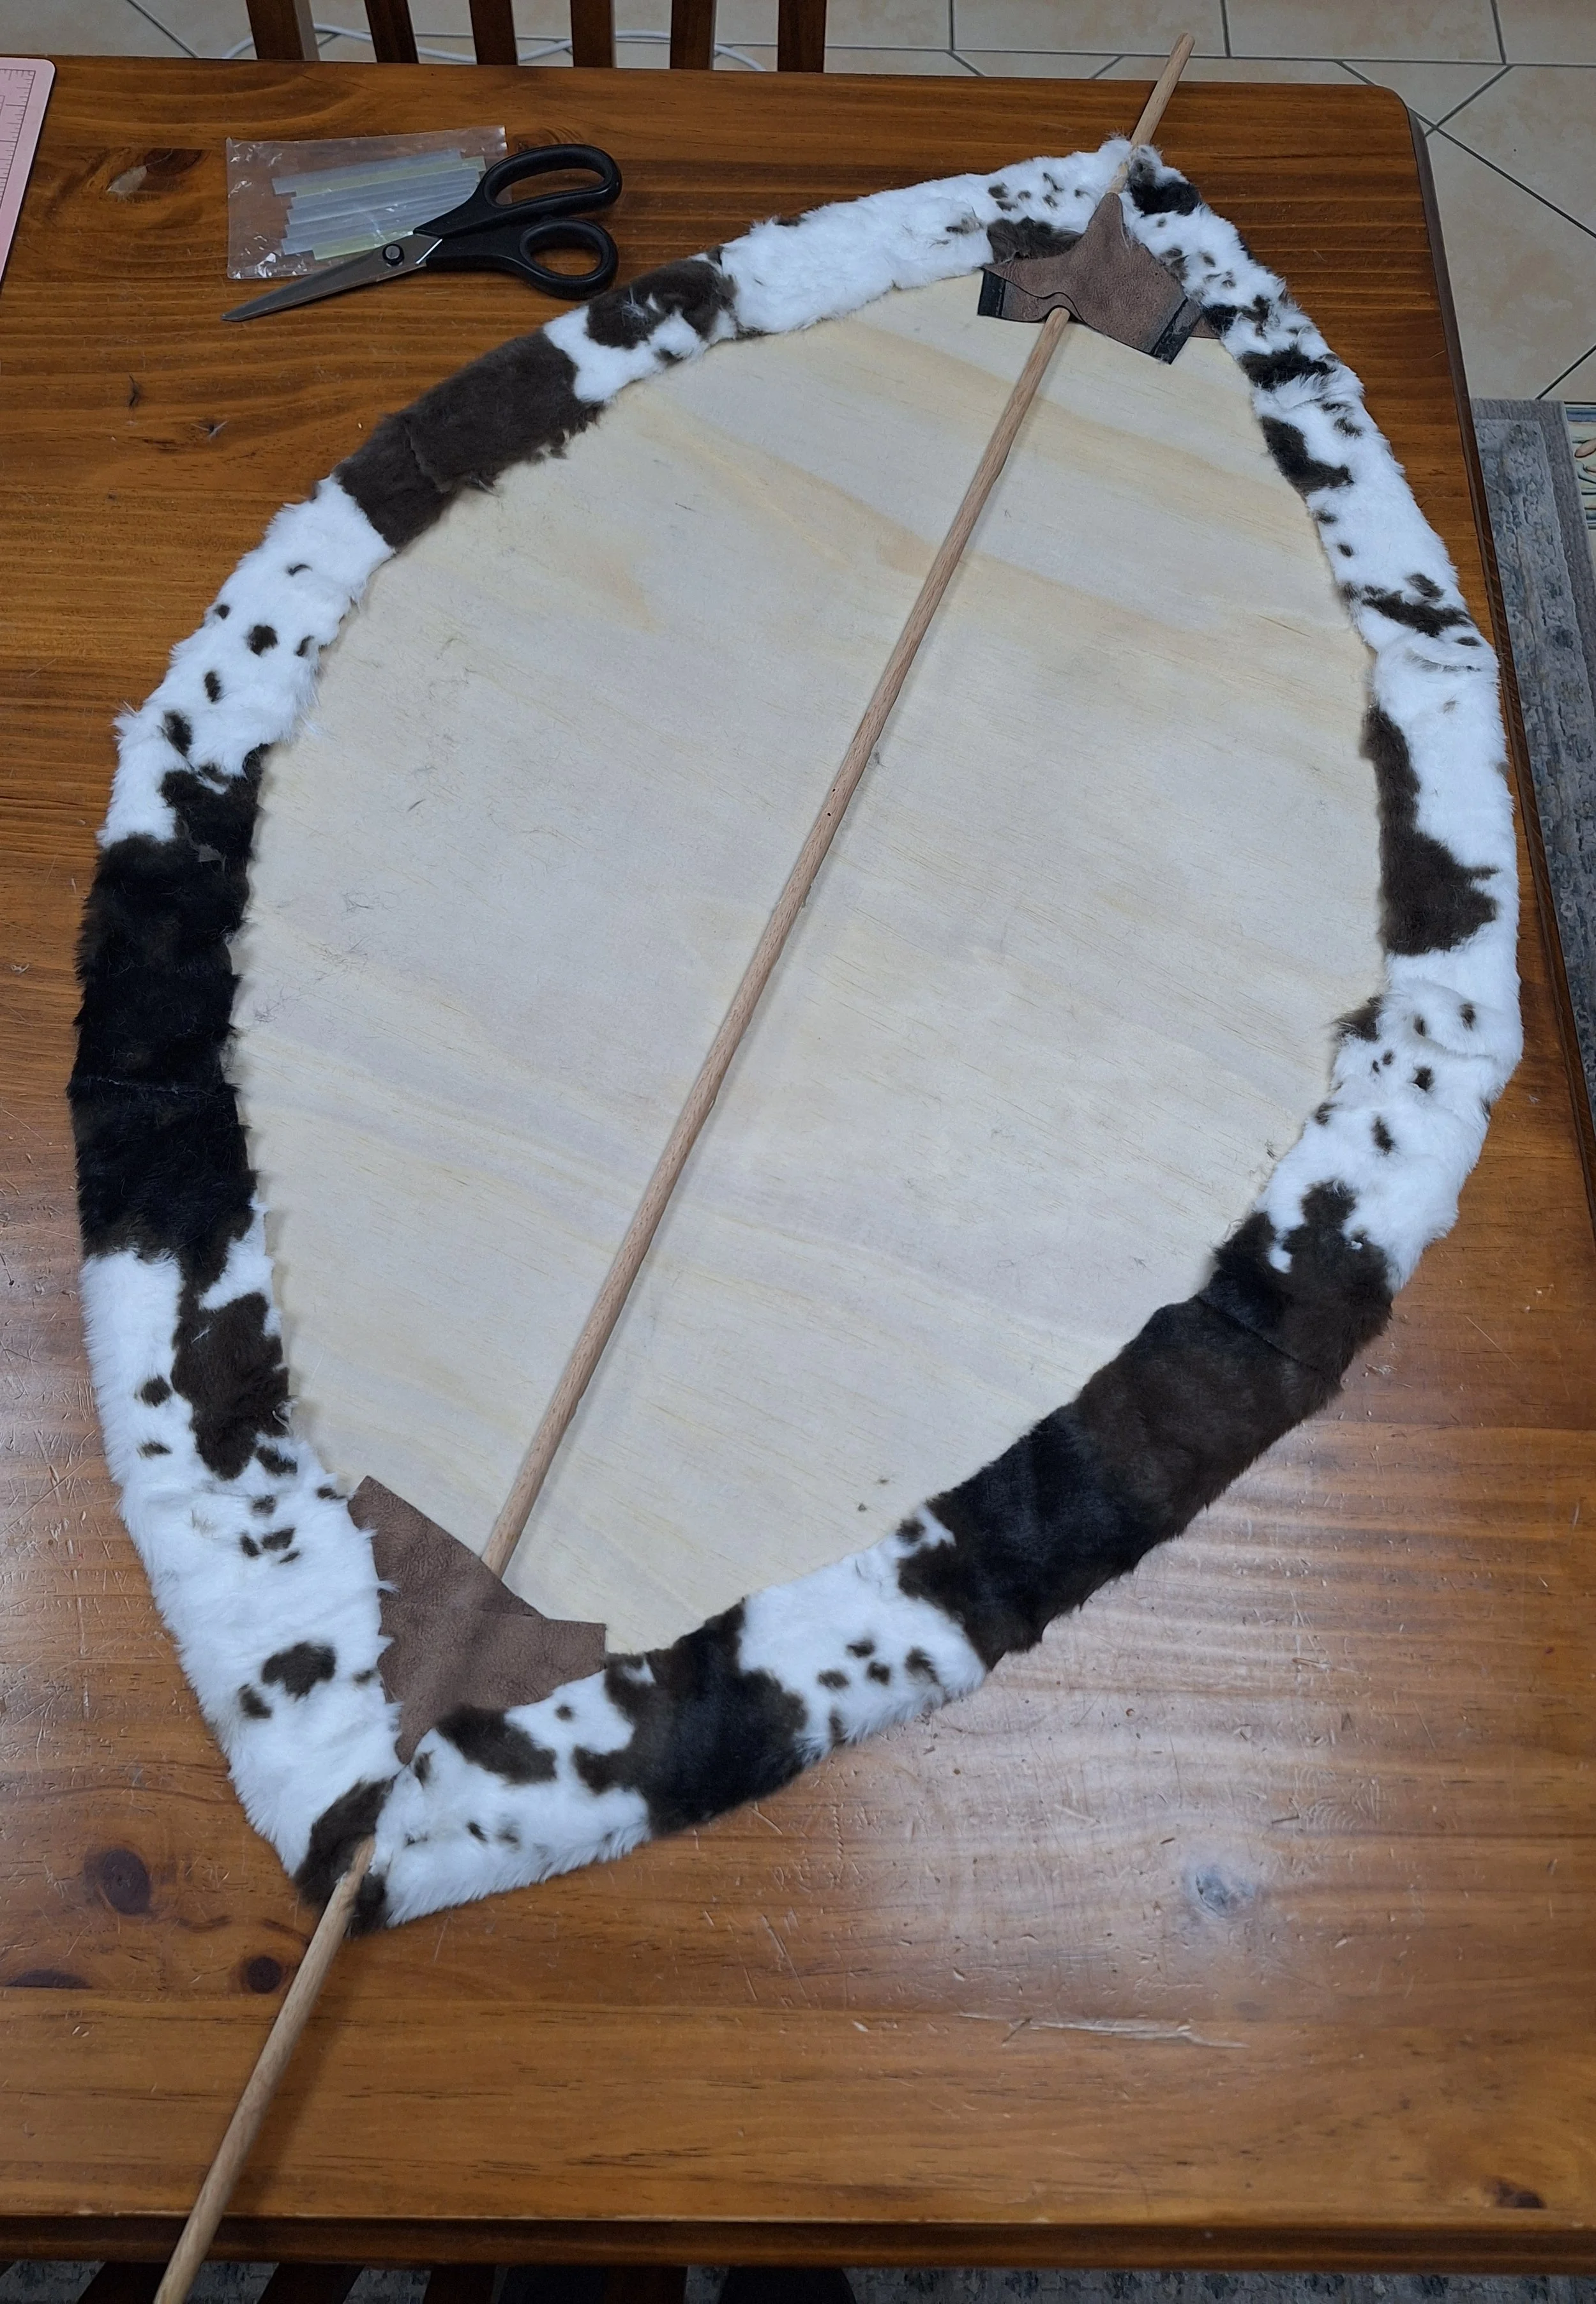
Once the hot glue was dried and the excess fluff from the faux hide fabric was taken off, the shield was complete!
Overall, the project was a success and completed in less than a day, spread over two days. The total cost for materials was around $50 AUD, and the end result I think speaks for itself!
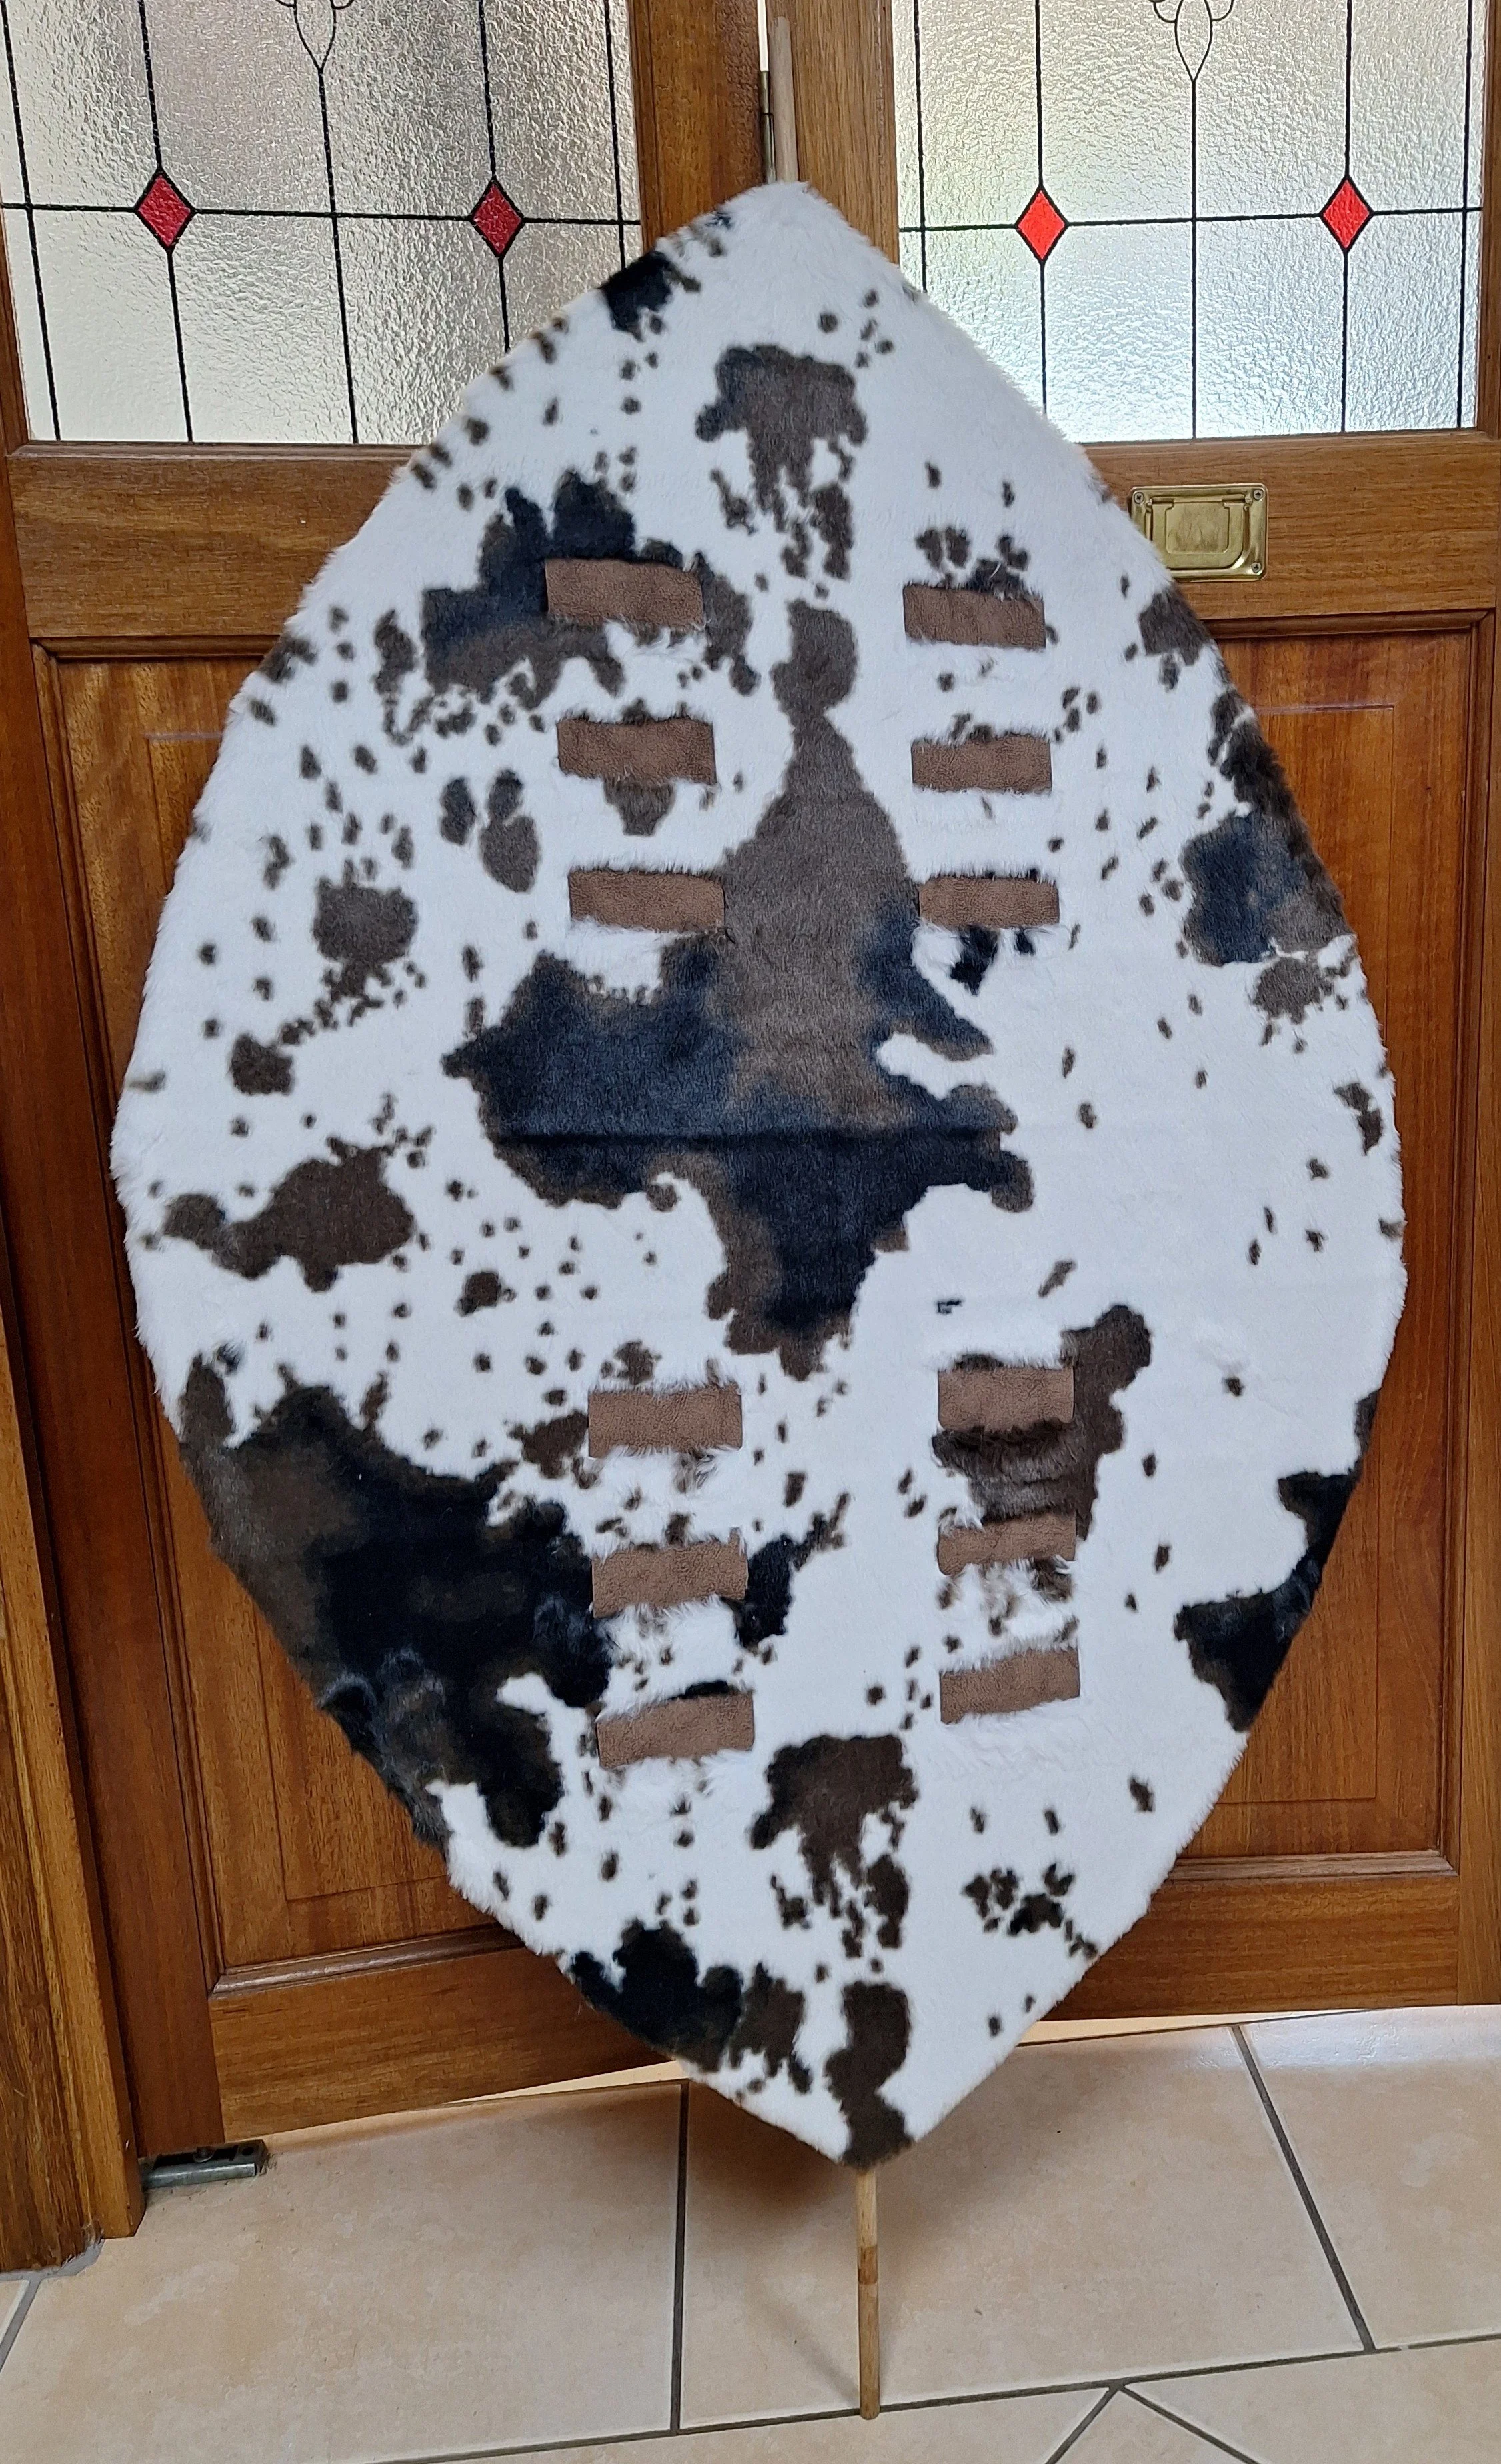
The completed replica has been accessioned into the museum’s collection, with a proper description included that states it is a replica, and referencing the sources which inspired its creation. I do not plan to make any more replicas but I am very pleased with how this one turned out. While it is not strictly true to the original techniques of construction, from the face alone the shield does look strikingly similar to a real isihlangu.